Tuesday, January 25, 2011

Two Month Stats

You see this kid?
0114_4313

The one with the crazy hairline? (It's exactly like her dad's.)
0114_4308

She's two months old now.
0114_4320

And now that she can hold up her head, she thinks she's pretty big stuff.
0114_4316-1
She's slightly on the scrawny side:

9lb 14oz (23rd percentile)
22 1/2in (53rd percentile)

Maybe petite is a better word. In any case, she's doing great. And she's so much fun.

Monday, January 24, 2011

Ta Da! The laundry nook is complete.

Yay, laundry nook. You work so much better now!

0120_4487

0120_4488-1

We've got a clothesline. Perfect for drying diaper covers.

0120_4490

We've got a designated diaper pail spot. Nice and tucked away.

0120_4492

We've got some organization. Laundry soap isn't scattered everywhere anymore! Score! This little blue box/basket was a little Target find. It holds all of the essentials: homemade laundry soap, Baby Oxyclean (great for getting out stains!), a bleach pen, etc.

0120_4496

We even have a little bucket in the corner. For clothes with "special cleaning needs." Read: they have recently been pooped on.

0120_4495

The candle is non-negotiable on diaper day.

0120_4494

And the work surface? Aaaahhhh. A great spot for folding a few towels. Or boxers. Or frilly little girly clothes.

0120_4486

I think this project cost us around $60. The MDF was $25, the clothesline was $13, and the blue box was another $10. We already had the paint. It's our beloved West Highland White that's splashed all over our house.

Whew. So glad to have this little project complete! It's a great little spot.

0120_4483


In case you missed it, here's segment one and segment two in the nook saga.

Thursday, January 20, 2011

I'm over it. Mostly.

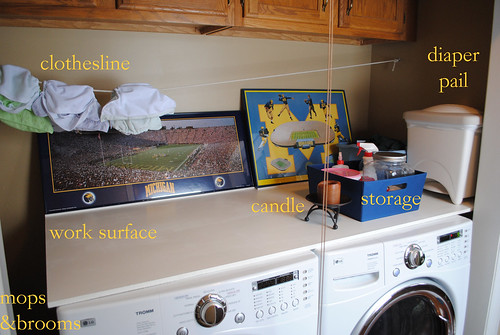
When I was pregnant, I spent all kinds of time researching baby gear. And why not? It's a fun way to pass the time. At that time I cared a lot about the aesthetic. The design. The color scheme. Did it fit with our house? Or Nugget's room? Did this shirt meet my criteria for cute baby clothes?

And now that I'm enormously experienced at this motherhood thing (ha!) I've come down from my high horse and realized that I just don't care as much as I thought I did. Rather, I care about other things.

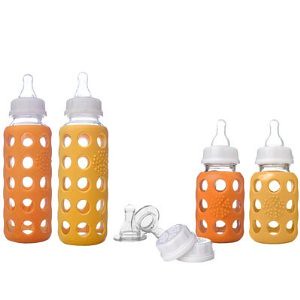
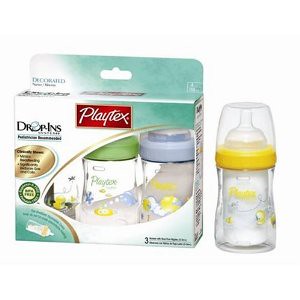
Take bottles, for instance. I though these ones were cutest. And I almost paid OVER $10 EACH for them. They were extra special glass and had those cute covers. My baby needed the best, right?

41c+JmsiQxL._SL500_AA300_

Well then I realized that glass bottles are HEAVY. Who wants that? And my practical (read: cheap) side kicked in and I bought bottles that numerous folks had recommended. 
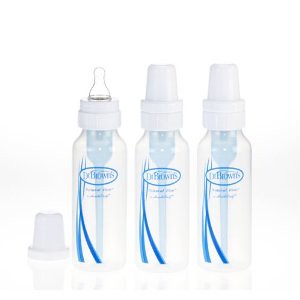
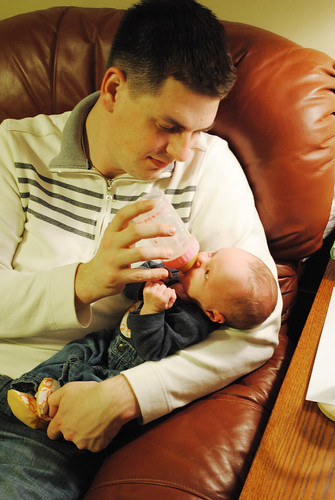
Dr. Browns. Because they were supposed to be the best at keeping air out of my baby's tummy. And who doesn't want that?

41U7lK+d8KL._AA300_

And then when Caroline finally came along, she decided that she didn't like Dr. Browns. *Sigh*

So you know what I did? I went to the store and bought some of the cheapest, most basic bottles on the market. The Playtex drop-ins. Nothing new or fancy or special about them. In fact, I think my parents used this kind of bottle for me. But you know what? She eats from them! And the drop-in liner is pretty dang convenient.

41m2qqgnknL._AA300_

Basically, I don't care what she drinks from as long as it works for her. Cute bottles? Who needs 'em?

1214_3730-1

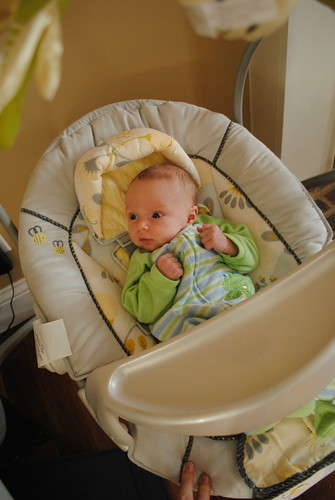
Then take equipment. All babies are so different in this area! In her two months of life, Caroline has taken little interest in her swing, which in my opinion is adorable. If she's already awake and happy, she's fine in there. And if she's already sleeping, she'll stay that way. But it doesn't soothe her. In fact, she'll get pretty PO'd if you try and stick her in there when she's fussy.

1224_3407

We also got the matching bouncer as a shower gift. Also adorable! It plays music and nature sounds and vibrates nicely. However, it likewise doesn't solve any of her problems.

1006_1093

(Mary Kate, I know you're reading this. If you want to borrow the bouncer once your baby comes, you're welcome to it! You can save your $ for cute clothes.)

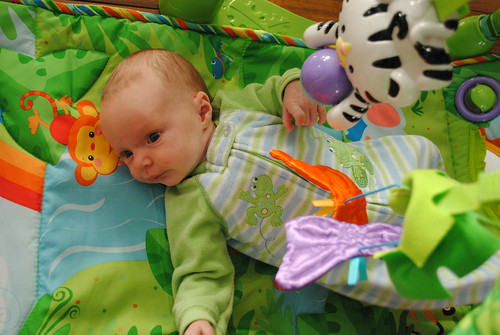
In fact, we get more use out of the play mat I picked up for $2.50 at a garage sale than out of either the swing or the bouncer.

1224_3412

When we were visiting friends last week in Michigan, Caroline sat in another kid's bouncer seat. That seat was more basic than ours, and actually bounced when I kicked it rhythmically with my foot. And you know what? It soothed her! She liked it!

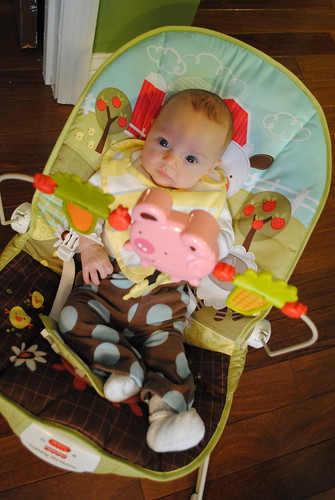
So a quick trip to Target and $25 later, we ended up with this guy. And lo and behold! I can unload the dishwasher (while bouncing her with my foot) and she's content in there! Or read a book on how to get your child to nap during the day (while bouncing her with my foot.) Is it particularly cute or soft or sweet? Does it play music? No, no, and no. Does it flow with the decor of our house? Nope. But IT WORKS.

0118_4255

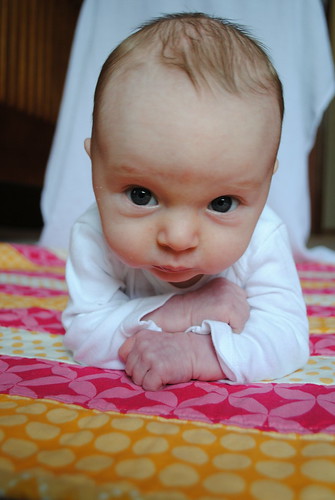
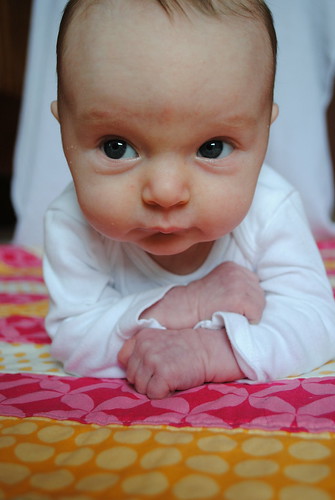
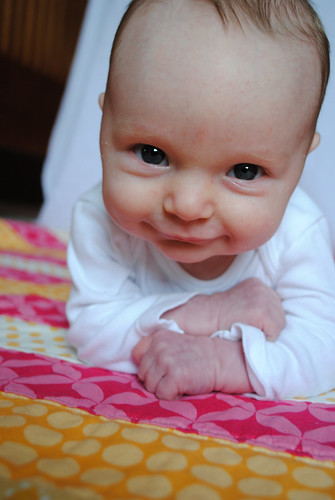
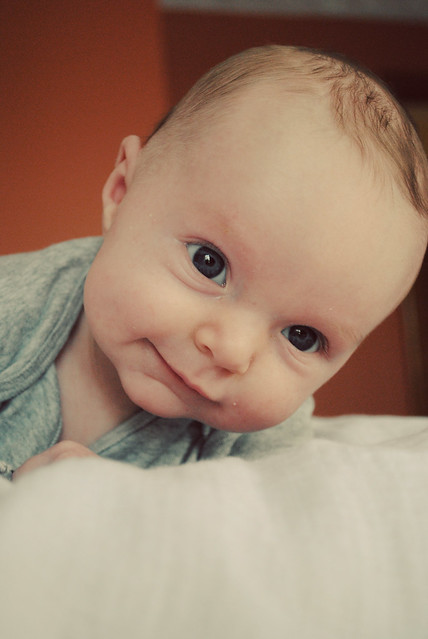
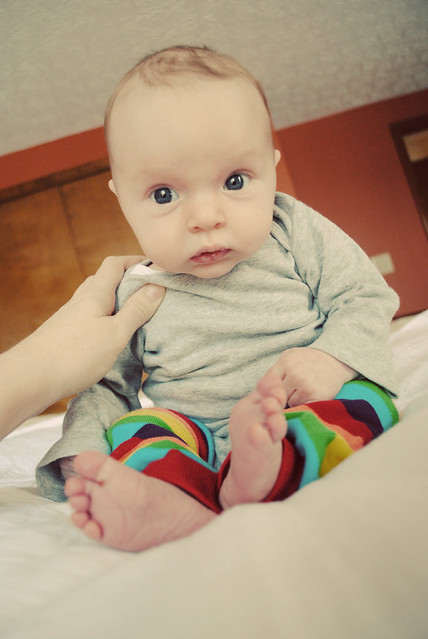
Then there's baby clothes. Call me a snob if you want, but always I thought I'd be picky about what she wore. And I kind of still am. But I have very different criteria these days. I used to drool over all kinds of kids clothes from all kinds of different companies. We bought a few things here and there for fun, and also received all kinds of clothes from generous friends and family.

I used to care about only what the clothes looked like on the hanger, or in the box.

Now it's way more important to me to see how they fit her. Dwell Studio clothes (which I love the looks of) have thus far been too wide for my string bean-ish child. They look awkward on her. I do have a Dwell Studio outfit waiting for her in the next size up, and I'm hopeful it work at that time. We have the same issue with Janie and Jack. Carter's clothes, on the other hand, fit her like a glove. And thus, they end up being my go-to clothes for her. I never disliked Carters, but I wouldn't have considered them my favorites, either, prior to Caroline's arrival.

I guess I'm just learning that motherhood is just big fat trial and error experience. A humbling one at that.

And I love it.

Tuesday, January 18, 2011

Laundry Nook in Progress

So, after cleaning up the area, here's where we were at to start out the project:


The trash can-ish thing is a diaper pail.

Step 1: Add a clothesline to the area.

Where does one go to purchase clothesline? I couldn't find it in stores around here, and so quickly navigated my way to Amazon and bought it there.

(On a side note, I bought 200 feet and only need about 20. Does anyone need some clothesline? We've got some to spare.)

We bought some simple "screw eyes" from the hardware store and screwed one into each wall of the nook. Then we tied the ends of clothesline into those "eyes."


Depending on our ongoing diaper needs, we may add another line to this space, or else string some up in the nearby garage. But for now one line works for us.

Step 2: Put in a big flat workspace.

The idea was simple. The reality was slightly more complicated.

The idea: buy a piece of wood, get it cut at the hardware store, paint it, and set it on top of the washer and dryer.

The reality: a tight fit, slightly uneven walls, and a few cords/hoses to work around.

First we measured out the dimensions of our nook, and planned out just how big we wanted our wood to be. We decided that on one side it should extend to the wall, but on the other side leave some space for the brooms and mops to be stored. We also wanted it to extend to the back of the nook so that junk couldn't fall behind the machines.

We bought a piece of MDF (medium density fiberboard) at the store and asked them to cut it to our basic dimensions.


Then we brought it home and used a jig saw to cut out some areas for the hoses and cords in the back.


Then we used some leftover trim paint to paint it white.

The right side butts up against the wall.


The left side ends where the dryer ends so that we've got a spot for the brooms and mops. You can also see where we tore up the wall putting it in.


I thought we'd need some additional stabilization so I'd added L brackets. As it turns out, the MDF is wedged in so tightly that the L brackets arent' necessary.


So far, so good. But that view above? It's ugly. There's a lot going on back there and it's just not the best look.

We dug in our basement (which we've been cleaning out lately anyway... stay tuned for that project!) and found some old "art" that we could use to hide the unsightly cords and pipes.


Oh yes. Go blue, baby.

I like the fact that the cords and such are still easily accessible, but hidden from view. Also, having these here will prevent little things (bleach pens, pencils, key chains, etc.) from falling behind the machines through those cut outs.

But then, don't washers and dryers vibrate? Won't those frames slide forward after a while?

Solution: Dowels. These cost under $1 and we just attached them onto the MDF with some wood glue. Easy! And they'll hold the precious M Go Blue art in place against the wall.


Aaaaand we're almost done! Stay tuned for the "big reveal." In the meantime, I've got another coat of paint to put on this sucker.

(And the fact that I just mentioned a "big reveal" for our little laundry nook makes me laugh... )

Sunday, January 16, 2011

How we got her name.

First name: Caroline

0110_4073-1

Our favorites early on were Caroline, Charlotte, and Georgia. Oh, and one I'm not sharing because it's still in the running for a future baby.

Charlotte was a front runner for a long time. And then we started thinking about it... Charlotte is a beautiful name, but what nicknames can be derived from that? Lottie? Not our favorite. Char? Sounds like she's 60. But the one that really made us nervous?

Charlie.

For this reason:


And then there was Georgia. We loved it. Classic, but unique. Spell-able and sweet. And then we googled it. And found that there's a song by the name of "Sweet Georgia Brown." An obnoxious song. The Harlem Globetrotters song, actually. And we didn't want people whistling that to her for her entire life.

0110_4048-1

And then there was Caroline. Cute nickname options (Carrie, Cara, Callie - but please don't call her Carol) and another classic, spell-able name. We were also shooting for name that wasn't in the top 50, according to the Social Security Administration. Our last name is so very common that we didn't want to pair it with a super popular first name. Check. And besides, we love it.

Middle Name: Hannah

0110_4081-1

We chose Hannah about 3 days before she was born. Keep in mind she was 10 days late, so we were clearly cutting it close on that one.

After tossing around lots and lots of options, we decided to shoot for a Biblical option for the middle name. For those of you who aren't familiar with feminine Biblical names, let me just tell you that the pikin's are slim. Boys names WAY outnumber girls. And then there are the obvious rejects:

Bathsheba (adulteress)
Rahab (prostitute)
Delilah (temptress)
Dorcas (I assume I don't need to explain)
Etcetera.

Plus, we wanted a Biblical name that connected to us and our story.

And then we came across this verse:

I prayed for this child, and the LORD has granted me what I asked of him.
1 Samuel 1:27

And I was reminded of the story behind this verse. The story of a woman who couldn't have children. A woman who cried bitterly over that reality. A woman who fervently prayed for a child. And the Lord heard her prayer.

She gave birth to a son, Samuel.

Her name was Hannah.

And we knew it was the right name for us.

0110_4057-1

Caroline Hannah.

Friday, January 14, 2011

For I know the plans I have for you, laundry nook.

Is that a sacrilegious title to this post? It was the first thing that popped into my head when I thought about writing this.

With the addition of Caroline into our family, the amount of laundry we do on a regular basis has changed. Expanded. No surprises there! Clothes. Hers and ours. Burp cloths. Crib sheets. Blankets. Aaaandd diapers.

You know how I said we were holding off on cloth? Well, I lied. We'd been having blow out problems with all the various disposable options we have around the house. Pampers Newborns. Pampers 1's. Huggies 1's. All the same. So we tried cloth diapers once again. And what do you know? They fit. Barely. Our blow out problems haven't completely gone away, but we've seen a bit of an improvement thus far.

Obviously, the addition of cloth diapers into our lives increases the amount of laundry we have to do each week. However, we also need to figure out where to store them while dirty and where to line dry them once they're clean.

Remember our laundry nook? The shades we put up still work great for tidying up the area quickly. Actually, they just hide the mess. Still very useful. But now I'd like to take the space to the next level.

Here's where we're at now:


Messy (my fault!) and disorganized. It's a dumping ground for things like mittens, laundry soup, and the dog's leash. And then once the machines start up, some of the junk falls off to the sides or behind them. Awesome.


Here are our needs for the space:

1. Dirty diaper storage. We spray off the really dirty stuff after they're used, but we still need a spot to dump the yet-to-be-cleaned diapers before they're chucked into the washing machine.

2. Clothes lines. The Bum Genius folks recommend line drying the diaper covers (the inserts can go in the dryer) but as of now we've got nowhere to do that. Nowhere that doesn't involve hanging them over the backs of the chairs in our eat-in kitchen, that is.


3. Broom/mop storage. We already use the corners of the nook for that very purpose, and we'd like to keep it that way.

4. A big flat workspace. Right now I use the tops of the machines, but it's not a great option because stuff can fall off. Plus, it's not perfectly flat. I'd like to be able to use that space to do some folding, some storage, etc.

5. Organization. Right now we've got a mess of laundry-related supplies jammed up in the cupboards and sitting hapharazdly on top of the machines.

Quite the laundry list, huh? (Sorry, couldn't resist.)

Oh, and we need to keep it cheap.

Stay tuned to see what we come up with!

Monday, January 10, 2011

DIY Diaper Wipes

Back at this shower my friend Erin an intriguing gift:

Supplies for making my own baby wipes.

This included a cylindrical air-tight container, half a roll of Bounty paper towel, baby oil, and baby soap.


Those of you who know me know I love a DIY project. Just look at this blog. And many of the folks who were at the shower this summer have since asked me how I liked them. Especially those guests that also have small children and get tired of purchasing baby wipes on a regular basis.

Well, let me just tell you -

I'm a fan!

A) They're easy to make.
B) They're great to use (the paper towel texture seems just right for wiping baby bottoms).
C) They're cheap.

Here's the link to Erin's blog, where she includes pictures and play-by-play instructions on how to make these little beauties.

Erin had received the diaper wipe kit at her baby shower, and then gave one to me at mine. So what did I give to a friend this past weekend at her baby shower? You guessed it. Pay it forward, baby.