1. I have recently discovered Pinterest. LOVE. Join me.
From the website: Pinterest is a virtual pinboard. Collect the things you love.
This means that I can "pin" house decor ideas/recipes/DIY directions/cute stuff for Caroline up on my "pinboard" and be able to come back and see them all organized nicely. MUCH BETTER THAN BOOKMARKS. Because I can see snapshots of images. I'm totally visual like that so it's super helpful for me. And I can access my "pins" on any computer I want.
Even better than bookmarking-on-steroids? I can see what others are into -- my friends, total strangers, and people whose blogs I regularly stalk. And get even more inspiration. Very fun.
2. On the subject of sharing ideas and getting inspiration, I got a super sweet comment today on this post:
We wanted to thank you for these great directions! We used them to make our own shelves for our nursery and we love them! You can see them here: http://mplusjequalslove.blogspot.com/2011/08/tysons-nursery-tour.html
It warms my heart that someone, somewhere out there, stumbled across this here blog and used my idea. And her nursery looks fabulous.
3. I go in waves when it comes to photography and sharing it on this blog. I get all inspired to take a bunch of pictures and use them in this blog, and then I get tired of it and forget I have a blog for a couple of weeks. I'm currently revving up to start picture-ing again here. Basically I just get inspired by the work of others and get back in the picture-taking/photoshopping/blogging saddle. We're almost there.
4. That's all. Happy Wednesday evening.
Showing posts with label Baby DIY. Show all posts
Showing posts with label Baby DIY. Show all posts
Wednesday, August 3, 2011
Saturday, June 25, 2011
Cloth Diapers
*Warning: I make several references to baby poop in this post*
As I've mentioned in the past, our family uses cloth diapers.
Most of the time, that is. We use disposables when we travel, or every once in awhile when we have to change a diaper on the run. I keep a few up&up's handy in our diaper bag.
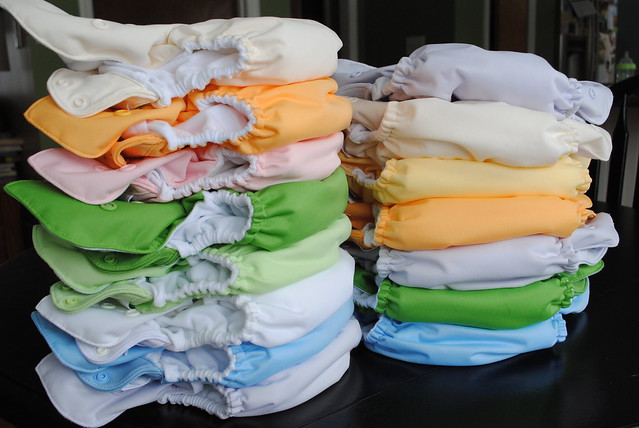
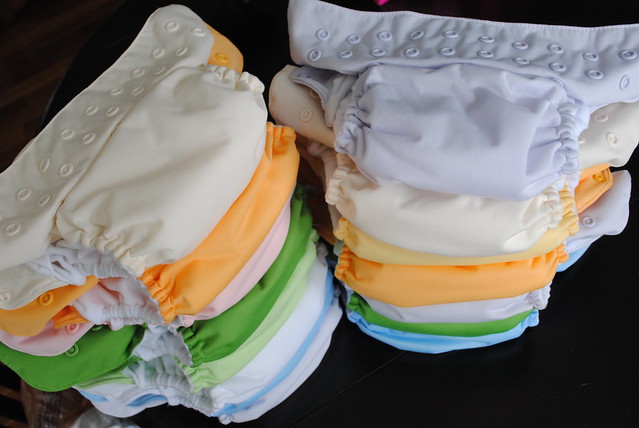
Here's a freshly-laundered stack of clean diapers. They come in a bunch of adorable colors! Now that it is summer, we can coordinate Caroline's dresses with her diapers for an extra-cute, extra-easy outfit.
For us, cloth diapers are a cost-saving measure. The initial investment was substantial, but it will save us money over the years. We're all for saving money on things like this. You know, so we can go on vacation more often and such.
Josh calls me a cloth diaper salesman. It's probably true. But that's only because I've had a number of people ask me about them -- friends who are potentially interested in doing cloth diapers with their own children. And cloth diapers work well for our family, so I'm happy to share about our little system.
I'll do my best to answer the questions here.
What kind do you use?
We use bumGenius 4.0's, the kind with snaps instead of velcro. We'd heard from friends that velcro can wear out after multiple washings. Snaps don't. At $17.95 each they aren't the cheapest cloth diapers on the market. But we have a few friends that use this brand and they've been happy with them. Plus, we figured that if we were going to go with cloth diapers, we wanted some that worked. Like really well.
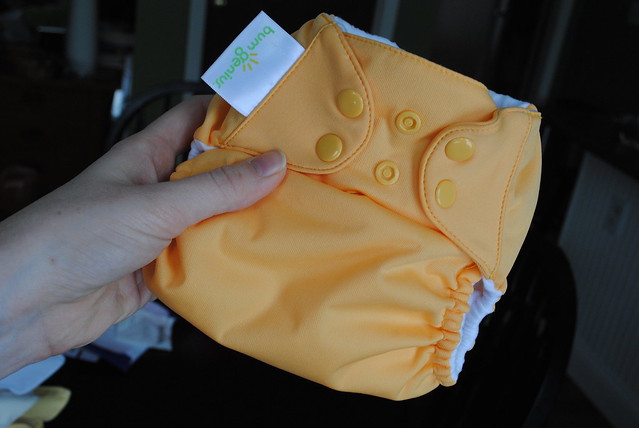
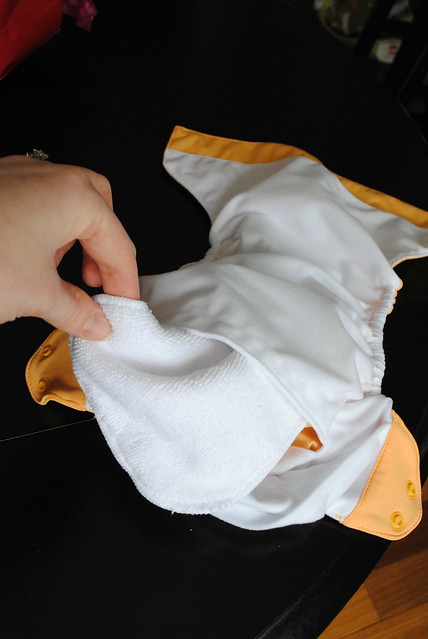
These particular diapers are called "pocket diapers" because (obviously) there is a pocket involved. There are two parts - the cover and the insert. The covers come one-size-fits-all with all kinds of adjustable snaps. And every diaper comes with two inserts, one that's small for infants, and one that's larger and adjustable for bigger kids. Caroline didn't stay in the infant size for very long, and now we use the larger, more absorbent insert. For overnight needs, we stuff her diapers with both inserts for super-duper absorbency. It looks like the world's largest diaper, but IT WORKS.
So yes, we've been really pleased with them thus far. They...
A) Keep poop and pee in. The most important part, of course!
B) Are cute.
C) Will expand to fit Caroline as she gets older.
D) Wash clean and dry quick.
E) Have different absorbency options for small babies and big babies, daytime and overnight.
When did you start using them?
Although the diapers claim to fit babies as small as 8 pounds, I don't think they're the best for itty bitty babies. They're just a little big for newborns. We put Caroline in cloth around 6 weeks old, when she was between 9 and 10 pounds. We'd thought we would wait a little longer, but disposable diapers kept failing us, again and again. Pampers. Huggies. Newborn and size 1. Daily blowouts. So we tried cloth, and found that our blowouts decreased SIGNIFICANTLY. Yee-haw.
Do they leak?
No diaper can keep it all in, all the time. But we've been really pleased with just how these work. Our blowouts went way down when we made the switch. She rarely pees or poop out of them.
What is the cost savings?
I've read that families spend $1500-$2000 on diapers by the time their kids are potty trained. On the flip side, we have about $500 worth of cloth diapers and they'll last the entire time. And, they can be re-used for future kids. Bonus.
What about poop?
There are no two ways around it. You have to get a little more up close and personal with your baby's poop when you're using cloth. Most of the time, you'll need to get the baby's poop out of the diaper before you wash it. But really, it's not that big of a deal. Aren't you already more up close and personal with somebody else's poop than you ever thought you'd be?
When your baby is on an all-mama-milk diet, dirty diapers are no big deal. You don't even need to get it out of the diaper before you launder it. Just take the poopy diaper off your child, store in somewhere, and throw it in the wash with the others, come time.
It all changes when your baby starts on solid foods. Her poop is no longer water soluble.
One of our friends turned us on to these little beauties: Flushable liners. We put these between Caroline's botton and her diaper with each change. And then when we've got a dirty diaper on our hands, we can just pull a corner of the liner off of the diaper, and dump it into the toilet. And flush it away. EASY.
They're usually a little residue left in the diaper, but the washing machine can handle it.
What about diaper rash cream?
Our diapers don't recommend you use diaper rash cream with them, because it can worm its way into the fabric and decrease the absorbency. Obviously this can be a bit problematic, since rash cream comes in handy. However, when you use diaper liners, you don't have to worry about it. They protect the diaper from the cream.
Are they hard to use?
Nope. The process of changing them is really similar to changing any other kind of diaper. Since we use liners, there's a very small extra step involved. We also use baby powder on her little bottom - the cornstarch-based kind. Traditional baby powder uses talc, and that can be bad for babies' lungs. So I read, anyway.
What about wipes?
We also use cloth diaper wipes (why not?) and have been pleased with them thus far. We use this kind, which we like because there's a little bit of texture involved. It comes in handy for scrubbing! They really look and feel like little washcloths. We keep a little bucket of water + a squirt of baby soap + a squirt of baby oil near her changing table. When we're ready for a change, we just dunk a dry cloth wipe into the bucket to get it wet, and then wipe away.
When we don't have the little bucket handy, we just dunk the dry wipe under a running faucet to wet it down. It works just fine.
Where do you store them?
bumGenius recommends that dirty and wet diapers be stored dry (no water or solution involved), which is great because it's super easy.
We've got two places where we keep them in our house, mainly because we have two floors and it's convenient to have two spots.
First, we've got a little plastic trash can/diaper pail in the garage.
The other spot is right in her bedroom. We bought a big wet bag online and put up a little sticky hook on her dresser. It is lined with something waterproof, and zips on top. And it does a great job of keeping all the smells in.
And - bonus - I just toss it in the washing machine with the diapers and clean them all at once.
What about the smell?
Of course used diapers smell. We just do our best to manage it. Diaper pail in the garage. Zipper bag in Caroline's room.
And on diaper washing day? Especially since our washer and dryer are right off of the kitchen? We burn candles. And sometimes just take off for an hour.
How do you launder them?
This part isn't too hard. First, pull the inserts out of the diaper covers and put them all in the washing machine, along with the wet bag and diaper wipes.
We have a fancy-schmancy washing machine (thanks to my in-laws!) that has a "Sanitary" cycle built right in. It's a looooong wash cycle (2+ hours) and we give it an extra rinse as well. Once per month we add a half cup of bleach to the load, which nicely takes care of lingering smells.
If you don't have a crazy washing machine, it's still totally doable. First wash the diapers on cold (to get the poop off, basically). Then wash on hot to get them nice and clean. Then give them an extra rinse before drying.
We line dry the diaper covers and use the dryer to dry the inserts, the wipes, and the wet bag.
You're supposed to be super careful on what you use for detergent, since dyes and certain chemicals can break down the diapers over time. We use a scoop of Charlie's Soap and a half scoop of Baby OxiClean.
And there you go. More than you ever wanted to know about cloth diapers! Anything I'm missing?
Any further tips and tricks that I should know about, all you veteran cloth diaper-ers?
Also, there's a bunch of resources on the internet (of course!) so feel free to check out these links for more info:
Cotton Babies FAQ
Pin Stripes and Polka Dots
As I've mentioned in the past, our family uses cloth diapers.
Most of the time, that is. We use disposables when we travel, or every once in awhile when we have to change a diaper on the run. I keep a few up&up's handy in our diaper bag.
Here's a freshly-laundered stack of clean diapers. They come in a bunch of adorable colors! Now that it is summer, we can coordinate Caroline's dresses with her diapers for an extra-cute, extra-easy outfit.
For us, cloth diapers are a cost-saving measure. The initial investment was substantial, but it will save us money over the years. We're all for saving money on things like this. You know, so we can go on vacation more often and such.
Josh calls me a cloth diaper salesman. It's probably true. But that's only because I've had a number of people ask me about them -- friends who are potentially interested in doing cloth diapers with their own children. And cloth diapers work well for our family, so I'm happy to share about our little system.
I'll do my best to answer the questions here.
What kind do you use?
We use bumGenius 4.0's, the kind with snaps instead of velcro. We'd heard from friends that velcro can wear out after multiple washings. Snaps don't. At $17.95 each they aren't the cheapest cloth diapers on the market. But we have a few friends that use this brand and they've been happy with them. Plus, we figured that if we were going to go with cloth diapers, we wanted some that worked. Like really well.
These particular diapers are called "pocket diapers" because (obviously) there is a pocket involved. There are two parts - the cover and the insert. The covers come one-size-fits-all with all kinds of adjustable snaps. And every diaper comes with two inserts, one that's small for infants, and one that's larger and adjustable for bigger kids. Caroline didn't stay in the infant size for very long, and now we use the larger, more absorbent insert. For overnight needs, we stuff her diapers with both inserts for super-duper absorbency. It looks like the world's largest diaper, but IT WORKS.
So yes, we've been really pleased with them thus far. They...
A) Keep poop and pee in. The most important part, of course!
B) Are cute.
C) Will expand to fit Caroline as she gets older.
D) Wash clean and dry quick.
E) Have different absorbency options for small babies and big babies, daytime and overnight.
When did you start using them?
Although the diapers claim to fit babies as small as 8 pounds, I don't think they're the best for itty bitty babies. They're just a little big for newborns. We put Caroline in cloth around 6 weeks old, when she was between 9 and 10 pounds. We'd thought we would wait a little longer, but disposable diapers kept failing us, again and again. Pampers. Huggies. Newborn and size 1. Daily blowouts. So we tried cloth, and found that our blowouts decreased SIGNIFICANTLY. Yee-haw.
Do they leak?
No diaper can keep it all in, all the time. But we've been really pleased with just how these work. Our blowouts went way down when we made the switch. She rarely pees or poop out of them.
What is the cost savings?
I've read that families spend $1500-$2000 on diapers by the time their kids are potty trained. On the flip side, we have about $500 worth of cloth diapers and they'll last the entire time. And, they can be re-used for future kids. Bonus.
What about poop?
There are no two ways around it. You have to get a little more up close and personal with your baby's poop when you're using cloth. Most of the time, you'll need to get the baby's poop out of the diaper before you wash it. But really, it's not that big of a deal. Aren't you already more up close and personal with somebody else's poop than you ever thought you'd be?
When your baby is on an all-mama-milk diet, dirty diapers are no big deal. You don't even need to get it out of the diaper before you launder it. Just take the poopy diaper off your child, store in somewhere, and throw it in the wash with the others, come time.
It all changes when your baby starts on solid foods. Her poop is no longer water soluble.
One of our friends turned us on to these little beauties: Flushable liners. We put these between Caroline's botton and her diaper with each change. And then when we've got a dirty diaper on our hands, we can just pull a corner of the liner off of the diaper, and dump it into the toilet. And flush it away. EASY.
They're usually a little residue left in the diaper, but the washing machine can handle it.
What about diaper rash cream?
Our diapers don't recommend you use diaper rash cream with them, because it can worm its way into the fabric and decrease the absorbency. Obviously this can be a bit problematic, since rash cream comes in handy. However, when you use diaper liners, you don't have to worry about it. They protect the diaper from the cream.
Are they hard to use?
Nope. The process of changing them is really similar to changing any other kind of diaper. Since we use liners, there's a very small extra step involved. We also use baby powder on her little bottom - the cornstarch-based kind. Traditional baby powder uses talc, and that can be bad for babies' lungs. So I read, anyway.
What about wipes?
We also use cloth diaper wipes (why not?) and have been pleased with them thus far. We use this kind, which we like because there's a little bit of texture involved. It comes in handy for scrubbing! They really look and feel like little washcloths. We keep a little bucket of water + a squirt of baby soap + a squirt of baby oil near her changing table. When we're ready for a change, we just dunk a dry cloth wipe into the bucket to get it wet, and then wipe away.
When we don't have the little bucket handy, we just dunk the dry wipe under a running faucet to wet it down. It works just fine.
Where do you store them?
bumGenius recommends that dirty and wet diapers be stored dry (no water or solution involved), which is great because it's super easy.
We've got two places where we keep them in our house, mainly because we have two floors and it's convenient to have two spots.
First, we've got a little plastic trash can/diaper pail in the garage.
The other spot is right in her bedroom. We bought a big wet bag online and put up a little sticky hook on her dresser. It is lined with something waterproof, and zips on top. And it does a great job of keeping all the smells in.
And - bonus - I just toss it in the washing machine with the diapers and clean them all at once.
What about the smell?
Of course used diapers smell. We just do our best to manage it. Diaper pail in the garage. Zipper bag in Caroline's room.
And on diaper washing day? Especially since our washer and dryer are right off of the kitchen? We burn candles. And sometimes just take off for an hour.
How do you launder them?
This part isn't too hard. First, pull the inserts out of the diaper covers and put them all in the washing machine, along with the wet bag and diaper wipes.
We have a fancy-schmancy washing machine (thanks to my in-laws!) that has a "Sanitary" cycle built right in. It's a looooong wash cycle (2+ hours) and we give it an extra rinse as well. Once per month we add a half cup of bleach to the load, which nicely takes care of lingering smells.
If you don't have a crazy washing machine, it's still totally doable. First wash the diapers on cold (to get the poop off, basically). Then wash on hot to get them nice and clean. Then give them an extra rinse before drying.
We line dry the diaper covers and use the dryer to dry the inserts, the wipes, and the wet bag.
You're supposed to be super careful on what you use for detergent, since dyes and certain chemicals can break down the diapers over time. We use a scoop of Charlie's Soap and a half scoop of Baby OxiClean.
And there you go. More than you ever wanted to know about cloth diapers! Anything I'm missing?
Any further tips and tricks that I should know about, all you veteran cloth diaper-ers?
Also, there's a bunch of resources on the internet (of course!) so feel free to check out these links for more info:
Cotton Babies FAQ
Pin Stripes and Polka Dots
Monday, February 14, 2011
Traveling with a baby.
The very idea seems to strike fear into the hearts of new parents. It was certainly a daunting thought to us a couple of weeks ago!
What should I pack? Will my baby cry on the plane? How do I navigate security with an infant? Can I bring milk or formula on board?
These are the questions that keep us new moms up at night.
We've now been to Phoenix and Orlando in the course of a couple of weeks. Those trips involved three different flights, a long car ride, and several different accommodations. Before our first trip, I asked the collective wisdom of facebook about their tips on flying with an infant. I received at least 20 responses in about five hours. Fantastic insights! They were super helpful to us as we traveled. And along the way, we gathered a few more tidbits.
Since we've been back, we've already had a number of friends ask for our tips for traveling with a baby. I figure there might be more of you out there wondering the same thing. So here we go...
1. Flexibility is your friend.
If you're a schedule nazi, I think you'll need to drop it for the duration of your trip. Go with the flow. Rock your baby to sleep, even if you're a cry-it-out-er at home. Feed your baby when she fusses, even if you usually feed on 3 hour intervals. Roll with it. Knowing upfront that everything will be haywire will make you feel better about life.
2. Nurse on the way up and nurse on the way down.
Or use a pacifier! Or feed a bottle. This was the #1 piece of advice we got on facebook, and it worked super well! I've heard that it helps equalize the pressure in their ears. I don't know if Caroline had any issues with pressure or not, but since we didn't have any crying fits during take off or landing, I'm going to assume it worked.
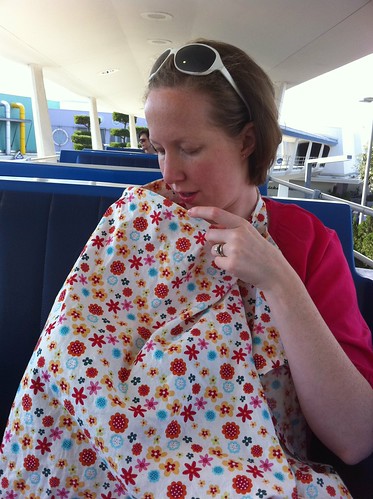
3. On that note, get used to nursing in public (if you nurse, obviously).
This is a fairly controversial/personal issue, I realize. Personally, I nurse Caroline everywhere. Park benches. Friends' houses. Restaurants. The backseat of a car (that is parked). Rides at Disney World. I don't like to isolate myself from my friends and family just because I need to feed my baby, so I cover up and nurse in all kinds of different locations. This was especially helpful when I was traveling, since good private locations for nursing just aren't always available. I personally use a nursing apron/cover, akin to this one so I'm always covered and discreet. If you sew at ALL, you can also find great patterns for them online. In any case, it might be my most-used baby item.
4. Leave your pump at home.
Because of my thoughts on #3, I was comfortable with kissing my pump goodbye temporarily. It's just a big space hog and not 100% necessary to a trip.
5. Buy pre-mixed formula.
We don't use much formula around here, but found it to be a very handy backup option for travel. Especially the ready-to-go cans. On one of the flights, Caroline got super cranky. Since we were confined to the seat, we weren't able to calm her down using normal methods. She'd recently nursed, so I knew I didn't have much mama milk for her to munch on. So for the sake of the other passengers, we gave her a formula bottle and it did the trick! We also found it helpful to have formula on hand for car trips. We were able to tide her over here and there if she fussed between stops.
6. Leave your car seat base at home.
Okay, first check your own car seat and make sure you can buckle in the carrier without a base. Read the directions and find out how to do it. And then save space in your luggage and leave the base in your own car at home. We have a Chicco Keyfit and it works perfectly to simply buckle it into any car.
7. Check with your airline about their allowances for checking car seats and strollers.
For our first trip, we used US Air. They allowed us to gate check either our car seat or a stroller for free. We knew we'd need both in Phoenix, so ended up stuffing an umbrella stroller into a duffel bag, and then packing our clothes in around it. That way we were able to just check (and pay for) one item instead of two. But that's just us and our cheap ways. The third flight was with AirTran and they allowed both a car seat and a stroller to be checked for free, either at the ticket counter or the gate. I found none of this information on the airline's website, and had to call them directly.
8. Put a cloth diaper cover over the disposable diaper on your baby's bum.
We have blow out issues at our house when we use disposable diapers. That was part of the reason we switched to cloth when we did. But we still use disposables for travel. Two different facebook friends recommended taking a BumGenius cover (no insert, just a cover) and putting it right on top of Caroline's disposable diaper for an extra layer of protection. It worked like a charm! It saved us from more than one blow out during our travels. I actually forgot to pack cloth diaper covers for Disney World, and had to deal with the consequences more than once. Not so fun.
9. Swaddle your baby into their car seat or stroller.
This was a trip from my friend DeeDee, mother of 3, two of which are twins. If you're a swaddle-r, you may have noticed that your velcro swaddle blankets have a hole near your baby's rear end. This is for car-seat swaddle ability. Simply lay the swaddle blanket into the car seat/stroller, and pull the bottom strap through the hole. Pull the wings through the arm holes, and the put your baby in. Buckle the car seat/stroller as usual, and then arrange the swaddle blanket around the baby. I've found that this strategy really helps Caroline sleep longer and better when she needs to nap on the go. This was great for both our car trip to Florida as well as our Disney World adventures.

(And please don't call the baby police on me for putting Caroline in an umbrella stroller prior to her 3 month mark. We didn't feel like dragging our big jogging stroller across the country. We also used that yellow cushion, which helped stabilize her little head.) Also, the swaddle blanket is the primary colored one with the planes, boats, and cars.
10. One heavy blanket and one light one should cover your blanket needs.
The heavy blanket doubles as a coat (with a car seat) or changing mat, in a pinch. The light one can be used as a sun shade, a burp cloth, a swaddle blanket, etc. Or, if you're my mom, a scarf.
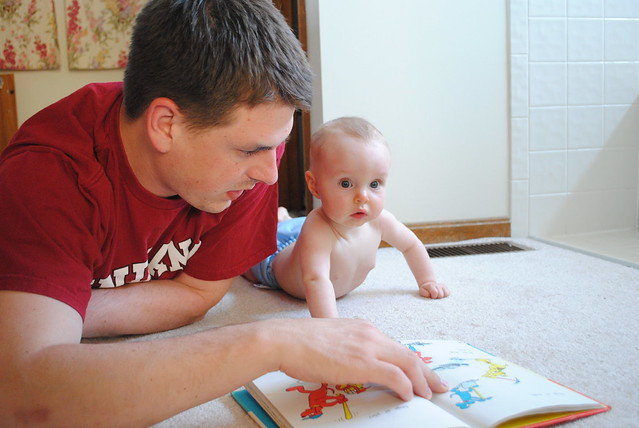
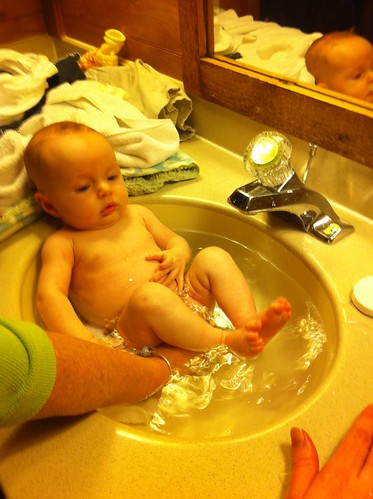
11. Make do.
Don't haul all of the baby crap you own with you. Since Caroline is so young, we left all toys and books at home. She's just as fascinated with colorful dishes and people's faces as she is with her teddy bears. She was also bathed in a variety of sinks, and toweled off with whatever was available. And she survived without her beloved bouncer seat.
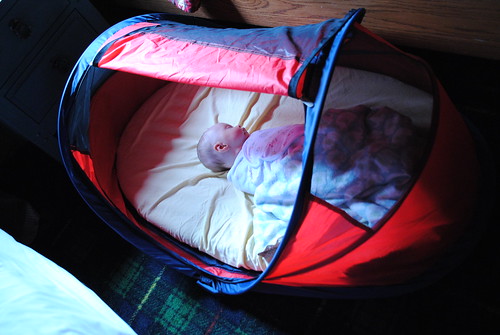
12. If you need to bring a baby bed with you, spring for a Peapod.
You're probably already aware of just how heavy and bulky your pack and play is! The Peapod bed is light (just over five pounds) and fits into carry-on sized luggage. We just took along one of her crib sheets and covered the little air mattress with that. A perfect baby bed for travel!
13. Hands-free carriers are great.
Caroline spent some quality time in her Moby Wrap while we gone! A Bjorn or Ergo would work just as well, I'm sure. It was great for navigating the airport on that third flight when Josh wasn't with me. The only drawback for flights is that they'll make you take it off when you go through security. It was also great for navigating the buses and boats and rides at Disney World. More on that later.
One of these days I'll do a post on Disney World with an infant. But for now, there are my top 13 tips on traveling with a baby. All of these things worked well for us, but I know that each baby and family is unique. Do what works best for you! And on that note, I'm super curious to learn just what that might be.
So, bloggy friends, do share!
What should I pack? Will my baby cry on the plane? How do I navigate security with an infant? Can I bring milk or formula on board?
These are the questions that keep us new moms up at night.
We've now been to Phoenix and Orlando in the course of a couple of weeks. Those trips involved three different flights, a long car ride, and several different accommodations. Before our first trip, I asked the collective wisdom of facebook about their tips on flying with an infant. I received at least 20 responses in about five hours. Fantastic insights! They were super helpful to us as we traveled. And along the way, we gathered a few more tidbits.
Since we've been back, we've already had a number of friends ask for our tips for traveling with a baby. I figure there might be more of you out there wondering the same thing. So here we go...
1. Flexibility is your friend.
If you're a schedule nazi, I think you'll need to drop it for the duration of your trip. Go with the flow. Rock your baby to sleep, even if you're a cry-it-out-er at home. Feed your baby when she fusses, even if you usually feed on 3 hour intervals. Roll with it. Knowing upfront that everything will be haywire will make you feel better about life.
2. Nurse on the way up and nurse on the way down.
Or use a pacifier! Or feed a bottle. This was the #1 piece of advice we got on facebook, and it worked super well! I've heard that it helps equalize the pressure in their ears. I don't know if Caroline had any issues with pressure or not, but since we didn't have any crying fits during take off or landing, I'm going to assume it worked.
3. On that note, get used to nursing in public (if you nurse, obviously).
This is a fairly controversial/personal issue, I realize. Personally, I nurse Caroline everywhere. Park benches. Friends' houses. Restaurants. The backseat of a car (that is parked). Rides at Disney World. I don't like to isolate myself from my friends and family just because I need to feed my baby, so I cover up and nurse in all kinds of different locations. This was especially helpful when I was traveling, since good private locations for nursing just aren't always available. I personally use a nursing apron/cover, akin to this one so I'm always covered and discreet. If you sew at ALL, you can also find great patterns for them online. In any case, it might be my most-used baby item.
4. Leave your pump at home.
Because of my thoughts on #3, I was comfortable with kissing my pump goodbye temporarily. It's just a big space hog and not 100% necessary to a trip.
5. Buy pre-mixed formula.
We don't use much formula around here, but found it to be a very handy backup option for travel. Especially the ready-to-go cans. On one of the flights, Caroline got super cranky. Since we were confined to the seat, we weren't able to calm her down using normal methods. She'd recently nursed, so I knew I didn't have much mama milk for her to munch on. So for the sake of the other passengers, we gave her a formula bottle and it did the trick! We also found it helpful to have formula on hand for car trips. We were able to tide her over here and there if she fussed between stops.
6. Leave your car seat base at home.
Okay, first check your own car seat and make sure you can buckle in the carrier without a base. Read the directions and find out how to do it. And then save space in your luggage and leave the base in your own car at home. We have a Chicco Keyfit and it works perfectly to simply buckle it into any car.
7. Check with your airline about their allowances for checking car seats and strollers.
For our first trip, we used US Air. They allowed us to gate check either our car seat or a stroller for free. We knew we'd need both in Phoenix, so ended up stuffing an umbrella stroller into a duffel bag, and then packing our clothes in around it. That way we were able to just check (and pay for) one item instead of two. But that's just us and our cheap ways. The third flight was with AirTran and they allowed both a car seat and a stroller to be checked for free, either at the ticket counter or the gate. I found none of this information on the airline's website, and had to call them directly.
8. Put a cloth diaper cover over the disposable diaper on your baby's bum.
We have blow out issues at our house when we use disposable diapers. That was part of the reason we switched to cloth when we did. But we still use disposables for travel. Two different facebook friends recommended taking a BumGenius cover (no insert, just a cover) and putting it right on top of Caroline's disposable diaper for an extra layer of protection. It worked like a charm! It saved us from more than one blow out during our travels. I actually forgot to pack cloth diaper covers for Disney World, and had to deal with the consequences more than once. Not so fun.
9. Swaddle your baby into their car seat or stroller.
This was a trip from my friend DeeDee, mother of 3, two of which are twins. If you're a swaddle-r, you may have noticed that your velcro swaddle blankets have a hole near your baby's rear end. This is for car-seat swaddle ability. Simply lay the swaddle blanket into the car seat/stroller, and pull the bottom strap through the hole. Pull the wings through the arm holes, and the put your baby in. Buckle the car seat/stroller as usual, and then arrange the swaddle blanket around the baby. I've found that this strategy really helps Caroline sleep longer and better when she needs to nap on the go. This was great for both our car trip to Florida as well as our Disney World adventures.
10. One heavy blanket and one light one should cover your blanket needs.
The heavy blanket doubles as a coat (with a car seat) or changing mat, in a pinch. The light one can be used as a sun shade, a burp cloth, a swaddle blanket, etc. Or, if you're my mom, a scarf.
11. Make do.
Don't haul all of the baby crap you own with you. Since Caroline is so young, we left all toys and books at home. She's just as fascinated with colorful dishes and people's faces as she is with her teddy bears. She was also bathed in a variety of sinks, and toweled off with whatever was available. And she survived without her beloved bouncer seat.
12. If you need to bring a baby bed with you, spring for a Peapod.
You're probably already aware of just how heavy and bulky your pack and play is! The Peapod bed is light (just over five pounds) and fits into carry-on sized luggage. We just took along one of her crib sheets and covered the little air mattress with that. A perfect baby bed for travel!
13. Hands-free carriers are great.
Caroline spent some quality time in her Moby Wrap while we gone! A Bjorn or Ergo would work just as well, I'm sure. It was great for navigating the airport on that third flight when Josh wasn't with me. The only drawback for flights is that they'll make you take it off when you go through security. It was also great for navigating the buses and boats and rides at Disney World. More on that later.
One of these days I'll do a post on Disney World with an infant. But for now, there are my top 13 tips on traveling with a baby. All of these things worked well for us, but I know that each baby and family is unique. Do what works best for you! And on that note, I'm super curious to learn just what that might be.
So, bloggy friends, do share!
Tuesday, January 18, 2011
Laundry Nook in Progress
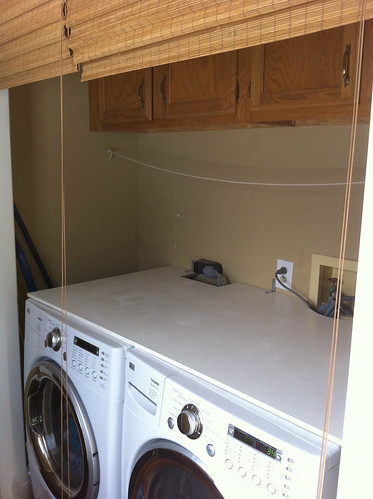
So, after cleaning up the area, here's where we were at to start out the project:
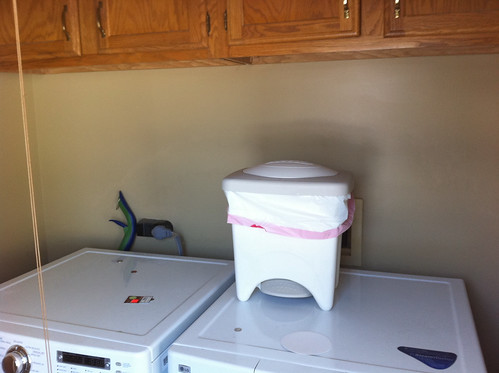
The trash can-ish thing is a diaper pail.
I thought we'd need some additional stabilization so I'd added L brackets. As it turns out, the MDF is wedged in so tightly that the L brackets arent' necessary.
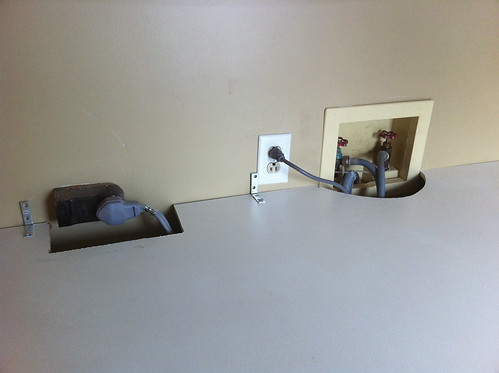
So far, so good. But that view above? It's ugly. There's a lot going on back there and it's just not the best look.
We dug in our basement (which we've been cleaning out lately anyway... stay tuned for that project!) and found some old "art" that we could use to hide the unsightly cords and pipes.
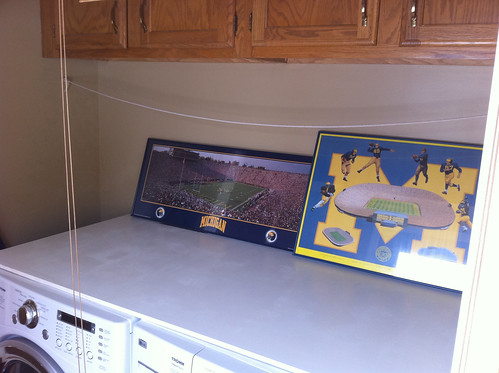
Oh yes. Go blue, baby.
I like the fact that the cords and such are still easily accessible, but hidden from view. Also, having these here will prevent little things (bleach pens, pencils, key chains, etc.) from falling behind the machines through those cut outs.
But then, don't washers and dryers vibrate? Won't those frames slide forward after a while?
Solution: Dowels. These cost under $1 and we just attached them onto the MDF with some wood glue. Easy! And they'll hold the precious M Go Blue art in place against the wall.
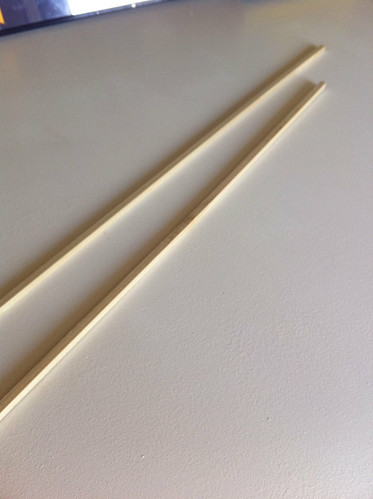
Aaaaand we're almost done! Stay tuned for the "big reveal." In the meantime, I've got another coat of paint to put on this sucker.
(And the fact that I just mentioned a "big reveal" for our little laundry nook makes me laugh... )
Step 1: Add a clothesline to the area.
Where does one go to purchase clothesline? I couldn't find it in stores around here, and so quickly navigated my way to Amazon and bought it there.
(On a side note, I bought 200 feet and only need about 20. Does anyone need some clothesline? We've got some to spare.)
We bought some simple "screw eyes" from the hardware store and screwed one into each wall of the nook. Then we tied the ends of clothesline into those "eyes."
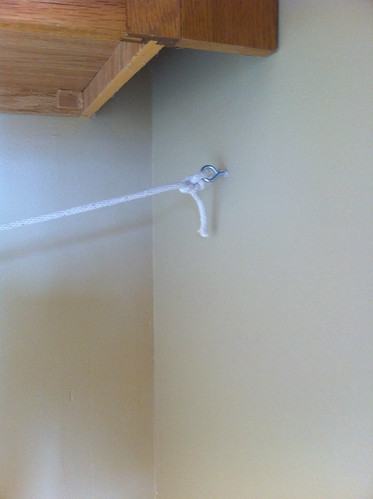
Depending on our ongoing diaper needs, we may add another line to this space, or else string some up in the nearby garage. But for now one line works for us.
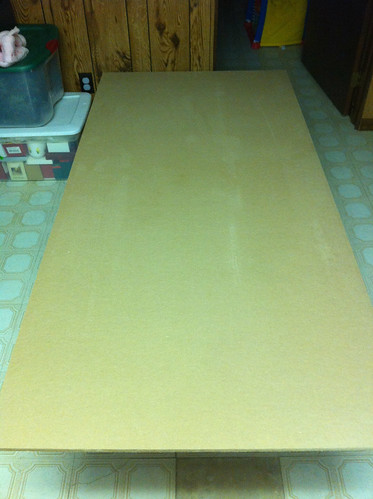
Step 2: Put in a big flat workspace.
The idea was simple. The reality was slightly more complicated.
The idea: buy a piece of wood, get it cut at the hardware store, paint it, and set it on top of the washer and dryer.
The reality: a tight fit, slightly uneven walls, and a few cords/hoses to work around.
First we measured out the dimensions of our nook, and planned out just how big we wanted our wood to be. We decided that on one side it should extend to the wall, but on the other side leave some space for the brooms and mops to be stored. We also wanted it to extend to the back of the nook so that junk couldn't fall behind the machines.
We bought a piece of MDF (medium density fiberboard) at the store and asked them to cut it to our basic dimensions.
Then we brought it home and used a jig saw to cut out some areas for the hoses and cords in the back.
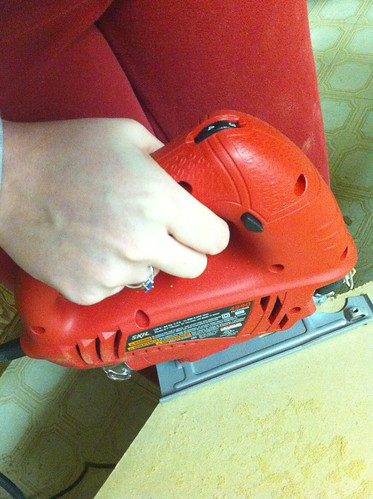
Then we used some leftover trim paint to paint it white.
The right side butts up against the wall.
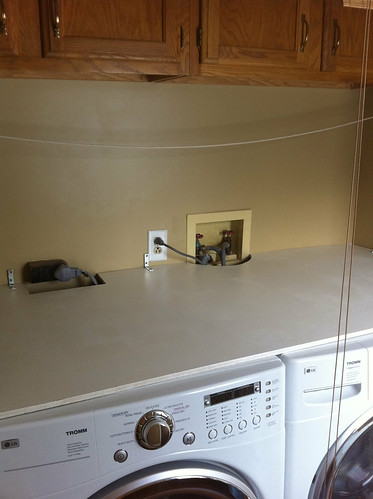
The left side ends where the dryer ends so that we've got a spot for the brooms and mops. You can also see where we tore up the wall putting it in.
Where does one go to purchase clothesline? I couldn't find it in stores around here, and so quickly navigated my way to Amazon and bought it there.
(On a side note, I bought 200 feet and only need about 20. Does anyone need some clothesline? We've got some to spare.)
We bought some simple "screw eyes" from the hardware store and screwed one into each wall of the nook. Then we tied the ends of clothesline into those "eyes."
Depending on our ongoing diaper needs, we may add another line to this space, or else string some up in the nearby garage. But for now one line works for us.
Step 2: Put in a big flat workspace.
The idea was simple. The reality was slightly more complicated.
The idea: buy a piece of wood, get it cut at the hardware store, paint it, and set it on top of the washer and dryer.
The reality: a tight fit, slightly uneven walls, and a few cords/hoses to work around.
First we measured out the dimensions of our nook, and planned out just how big we wanted our wood to be. We decided that on one side it should extend to the wall, but on the other side leave some space for the brooms and mops to be stored. We also wanted it to extend to the back of the nook so that junk couldn't fall behind the machines.
We bought a piece of MDF (medium density fiberboard) at the store and asked them to cut it to our basic dimensions.
Then we brought it home and used a jig saw to cut out some areas for the hoses and cords in the back.
Then we used some leftover trim paint to paint it white.
The right side butts up against the wall.
The left side ends where the dryer ends so that we've got a spot for the brooms and mops. You can also see where we tore up the wall putting it in.
I thought we'd need some additional stabilization so I'd added L brackets. As it turns out, the MDF is wedged in so tightly that the L brackets arent' necessary.
So far, so good. But that view above? It's ugly. There's a lot going on back there and it's just not the best look.
We dug in our basement (which we've been cleaning out lately anyway... stay tuned for that project!) and found some old "art" that we could use to hide the unsightly cords and pipes.
Oh yes. Go blue, baby.
I like the fact that the cords and such are still easily accessible, but hidden from view. Also, having these here will prevent little things (bleach pens, pencils, key chains, etc.) from falling behind the machines through those cut outs.
But then, don't washers and dryers vibrate? Won't those frames slide forward after a while?
Solution: Dowels. These cost under $1 and we just attached them onto the MDF with some wood glue. Easy! And they'll hold the precious M Go Blue art in place against the wall.
Aaaaand we're almost done! Stay tuned for the "big reveal." In the meantime, I've got another coat of paint to put on this sucker.
(And the fact that I just mentioned a "big reveal" for our little laundry nook makes me laugh... )
Friday, January 14, 2011
For I know the plans I have for you, laundry nook.
Is that a sacrilegious title to this post? It was the first thing that popped into my head when I thought about writing this.
With the addition of Caroline into our family, the amount of laundry we do on a regular basis has changed. Expanded. No surprises there! Clothes. Hers and ours. Burp cloths. Crib sheets. Blankets. Aaaandd diapers.
You know how I said we were holding off on cloth? Well, I lied. We'd been having blow out problems with all the various disposable options we have around the house. Pampers Newborns. Pampers 1's. Huggies 1's. All the same. So we tried cloth diapers once again. And what do you know? They fit. Barely. Our blow out problems haven't completely gone away, but we've seen a bit of an improvement thus far.
Obviously, the addition of cloth diapers into our lives increases the amount of laundry we have to do each week. However, we also need to figure out where to store them while dirty and where to line dry them once they're clean.
Remember our laundry nook? The shades we put up still work great for tidying up the area quickly. Actually, they just hide the mess. Still very useful. But now I'd like to take the space to the next level.
Here's where we're at now:
Messy (my fault!) and disorganized. It's a dumping ground for things like mittens, laundry soup, and the dog's leash. And then once the machines start up, some of the junk falls off to the sides or behind them. Awesome.
Here are our needs for the space:
1. Dirty diaper storage. We spray off the really dirty stuff after they're used, but we still need a spot to dump the yet-to-be-cleaned diapers before they're chucked into the washing machine.
2. Clothes lines. The Bum Genius folks recommend line drying the diaper covers (the inserts can go in the dryer) but as of now we've got nowhere to do that. Nowhere that doesn't involve hanging them over the backs of the chairs in our eat-in kitchen, that is.
3. Broom/mop storage. We already use the corners of the nook for that very purpose, and we'd like to keep it that way.
4. A big flat workspace. Right now I use the tops of the machines, but it's not a great option because stuff can fall off. Plus, it's not perfectly flat. I'd like to be able to use that space to do some folding, some storage, etc.
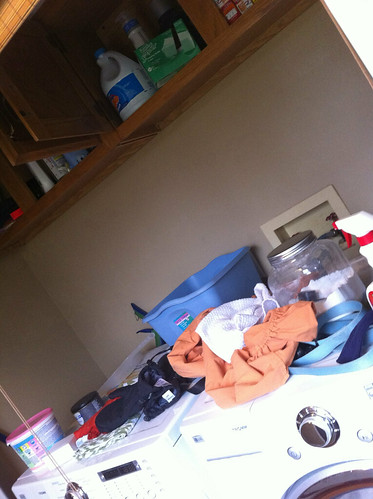
5. Organization. Right now we've got a mess of laundry-related supplies jammed up in the cupboards and sitting hapharazdly on top of the machines.
Quite the laundry list, huh? (Sorry, couldn't resist.)
Oh, and we need to keep it cheap.
Stay tuned to see what we come up with!
With the addition of Caroline into our family, the amount of laundry we do on a regular basis has changed. Expanded. No surprises there! Clothes. Hers and ours. Burp cloths. Crib sheets. Blankets. Aaaandd diapers.
You know how I said we were holding off on cloth? Well, I lied. We'd been having blow out problems with all the various disposable options we have around the house. Pampers Newborns. Pampers 1's. Huggies 1's. All the same. So we tried cloth diapers once again. And what do you know? They fit. Barely. Our blow out problems haven't completely gone away, but we've seen a bit of an improvement thus far.
Obviously, the addition of cloth diapers into our lives increases the amount of laundry we have to do each week. However, we also need to figure out where to store them while dirty and where to line dry them once they're clean.
Remember our laundry nook? The shades we put up still work great for tidying up the area quickly. Actually, they just hide the mess. Still very useful. But now I'd like to take the space to the next level.
Here's where we're at now:
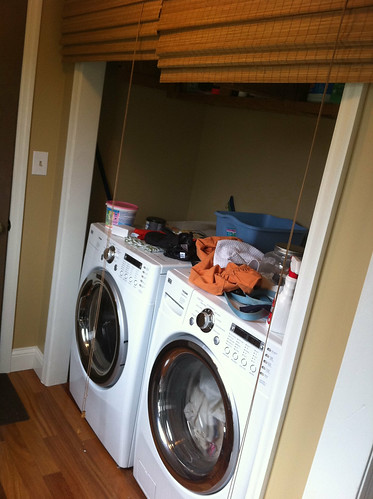
Messy (my fault!) and disorganized. It's a dumping ground for things like mittens, laundry soup, and the dog's leash. And then once the machines start up, some of the junk falls off to the sides or behind them. Awesome.
Here are our needs for the space:
1. Dirty diaper storage. We spray off the really dirty stuff after they're used, but we still need a spot to dump the yet-to-be-cleaned diapers before they're chucked into the washing machine.
2. Clothes lines. The Bum Genius folks recommend line drying the diaper covers (the inserts can go in the dryer) but as of now we've got nowhere to do that. Nowhere that doesn't involve hanging them over the backs of the chairs in our eat-in kitchen, that is.

3. Broom/mop storage. We already use the corners of the nook for that very purpose, and we'd like to keep it that way.
4. A big flat workspace. Right now I use the tops of the machines, but it's not a great option because stuff can fall off. Plus, it's not perfectly flat. I'd like to be able to use that space to do some folding, some storage, etc.
5. Organization. Right now we've got a mess of laundry-related supplies jammed up in the cupboards and sitting hapharazdly on top of the machines.
Quite the laundry list, huh? (Sorry, couldn't resist.)
Oh, and we need to keep it cheap.
Stay tuned to see what we come up with!
Monday, January 10, 2011
DIY Diaper Wipes
Back at this shower my friend Erin an intriguing gift:
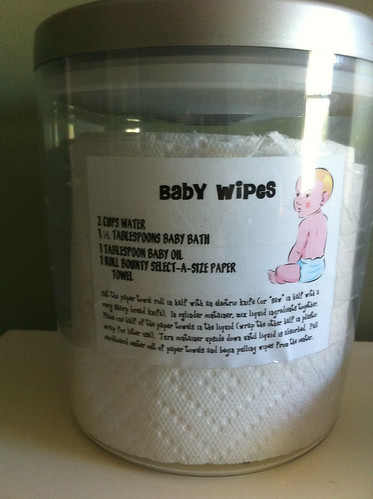
Supplies for making my own baby wipes.
This included a cylindrical air-tight container, half a roll of Bounty paper towel, baby oil, and baby soap.
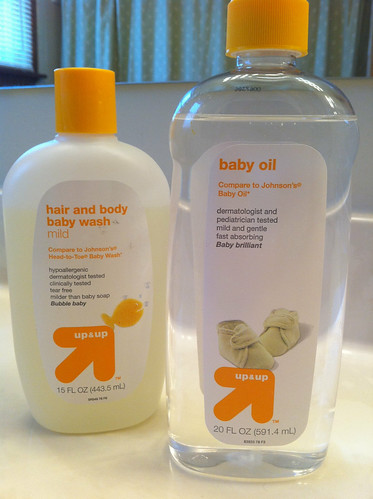
Those of you who know me know I love a DIY project. Just look at this blog. And many of the folks who were at the shower this summer have since asked me how I liked them. Especially those guests that also have small children and get tired of purchasing baby wipes on a regular basis.
Well, let me just tell you -
I'm a fan!
A) They're easy to make.
B) They're great to use (the paper towel texture seems just right for wiping baby bottoms).
C) They're cheap.
Here's the link to Erin's blog, where she includes pictures and play-by-play instructions on how to make these little beauties.
Erin had received the diaper wipe kit at her baby shower, and then gave one to me at mine. So what did I give to a friend this past weekend at her baby shower? You guessed it. Pay it forward, baby.
Supplies for making my own baby wipes.
This included a cylindrical air-tight container, half a roll of Bounty paper towel, baby oil, and baby soap.
Those of you who know me know I love a DIY project. Just look at this blog. And many of the folks who were at the shower this summer have since asked me how I liked them. Especially those guests that also have small children and get tired of purchasing baby wipes on a regular basis.
Well, let me just tell you -
I'm a fan!
A) They're easy to make.
B) They're great to use (the paper towel texture seems just right for wiping baby bottoms).
C) They're cheap.
Here's the link to Erin's blog, where she includes pictures and play-by-play instructions on how to make these little beauties.
Erin had received the diaper wipe kit at her baby shower, and then gave one to me at mine. So what did I give to a friend this past weekend at her baby shower? You guessed it. Pay it forward, baby.
Subscribe to:
Posts (Atom)