As we are preparing for a major overseas move in the next six weeks, we're quickly coming to terms with the fact that we have a lot of stuff. A LOT.
Some will go with us to London.
Some will stay here, stored in our basement.
And the rest is headed out of our lives.
Anyone looking for a old clothes of the Brown family? We just sent a Subaru-full to Goodwill this past weekend. At least 10 garbage bags full. It's obscene, especially since we have lots of clothes remaining in our closets and drawers. And we have yet to go through baby clothes, books, luggage, toys, or linens. We're expecting to take at least two more full-car runs.
How in the WORLD do we accumulate so much stuff?
It's sobering. And a little disgusting.
And yet purging? Feels great. Like shedding a few pounds.
We COULD use a little help, however, Internet friends...
1. What are your favorite purging secrets/methods/techniques/tips? We're all ears.
For the most part, we're trying to think through A) have we used it in the last year, or B) do we really love it and hope to use it again? If both can be answered in the negative, we're basically letting it go. But I'm sure y'all have some more thoughts on this matter.
2. For our Columbus friends: Are there any good charities/shelters/crisis pregnancy centers/etc. where we should donate? Specifically some of the baby stuff we're not taking? I'm happy with Goodwill and what they're up to, but if there are other organizations collecting, say, toys for the under-three-year-old set, we'd be happy to send some things their way.
3. How, once you purge, do you resist temptation to fill your life with stuff again? While ideally I love the concept of a simplified lifestyle, in reality new stuff always seems to make its way into our lives.
Thanks, friends!
Showing posts with label House. Show all posts
Showing posts with label House. Show all posts
Friday, July 20, 2012
Sunday, February 26, 2012
The Basement Project: Ceiling & Lighting
Um, I started this series in April of last year. Since it's almost a year later, how 'bout I finish it?
After our we cleaned up the joint, we had to decide how to move forward with updating the ceiling. The stained ceiling tiles just weren't quite doing it for us. Go figure. And the brown metal grid? Totally 80's.

Don't be jealous when you check out the lighting, the tiles, the paneling + drywall, and the ceiling. I know you wish your basement looked like this.
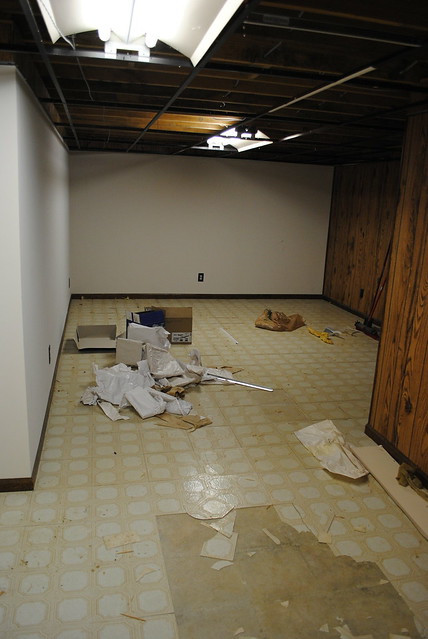
As a part of that decision, we needed to figure out the overhead lighting in the room. Florescent tubes behind plastic? Not quite our style. Also, it was just dim (read: scary) down there all the time. Time for us to ramp up the wattage. We've found that simply adding additional lighting in a basement ratchets back the "creepy" factor a good deal.
For the ceiling, we first had to decide between these two options:
1. Drywall / Real Ceiling
2. Make the drop ceiling look more attractive.
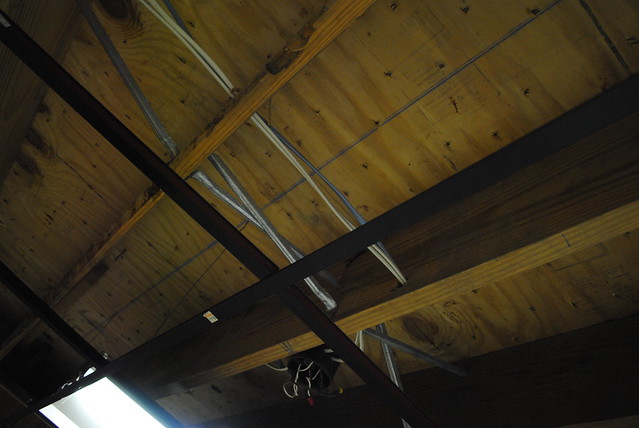
In the end we chose option #2. We had both an electrician and a plumber weigh in on whether or not we should go for the "real ceiling" look, and both said they wouldn't do it. In the ceiling of many basements lie all kinds of pipes and ducts and junk, and cutting yourself off from those things can only make for a headache down the line. Basically, you'll have to cut holes in your ceiling (and hope you can patch them up pretty well) if / WHEN something starts leaking or otherwise goes wrong. Us? We can pull out the tile, fix the problem, and pop the tile back in. If it gets damaged along the way, we can just buy a new one.
Another issue with option 1? More expensive. And our DIY skills didn't stretch that far. Plus, it's just a basement. A play room.
So, that left us with #2. Make the drop ceiling look more attractive. We toyed with the idea of making rectangle holes into square holes by adding some extra metal bars (and then buying square replacement tiles). Perhaps square tiles are a bit more up-to-date? But we added up the dough and it would have cost us at least $500 to do that. The extra metal bars + more expensive square tiles = NOT WORTH IT. To us, at least.
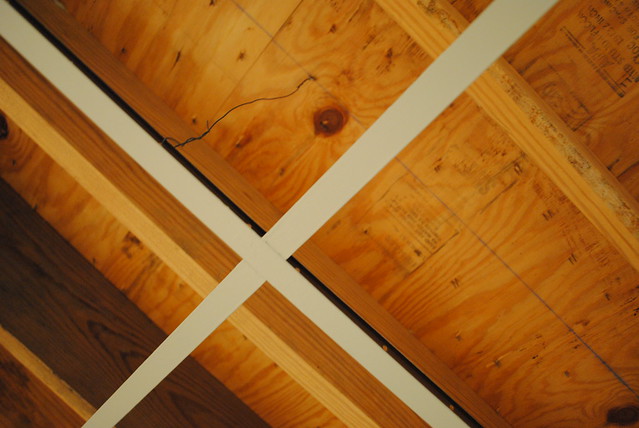
However, we could inexpensively update the look of the metal grid by simply painting over the ugly dark brown. We asked the paint shop folks, who sold us the correct kind of paint (we chose a light gray), and we covered up the 1985 look for about $15.
{Side note: when painting a ceiling, be sure to wear protective glasses. I was doing some touch ups, and got a big drop of gray paint IN MY EYE. In a panic I screamed for Josh to call poison control, sure I'd soon be getting fitted for a glass eye. IT HURT SO BAD. Gratefully the kind soul on the phone talked me down off the ledge and had me rinse out my eye in the sink. For 20 minutes. Folks, that's a long time to stand over a sink and allow water to rush onto your eyeball. But gratefully all was okay.}
For the ceiling tiles, we chose with the most basic, most boring white ones from Lowe's. Although they've got some pretty fancy options, we thought that it would be best to keep the visual focus off of the ceiling.
For the lighting, we elected to go with recessed can lights. Our electrician was able to get the correct equipment to attach them to the metal grid, and then he sawed holes into the our new tiles to pop the lights into them. Not bad!

Unfortunately for our pocket book, this was an expensive step. $100 per light times 13 of them. My electric skills stop at "install a new light fixture." For this job we were not only changing fixtures, but adding lights and changing locations. So, we ponied up. And the end effect is totally worth it. LET THERE BE LIGHT.
Yes, there just MIGHT be a coat of paint on those walls. More on that later.
If you'd like to see the true "before" pics, check here.
After our we cleaned up the joint, we had to decide how to move forward with updating the ceiling. The stained ceiling tiles just weren't quite doing it for us. Go figure. And the brown metal grid? Totally 80's.
Don't be jealous when you check out the lighting, the tiles, the paneling + drywall, and the ceiling. I know you wish your basement looked like this.
As a part of that decision, we needed to figure out the overhead lighting in the room. Florescent tubes behind plastic? Not quite our style. Also, it was just dim (read: scary) down there all the time. Time for us to ramp up the wattage. We've found that simply adding additional lighting in a basement ratchets back the "creepy" factor a good deal.
For the ceiling, we first had to decide between these two options:
1. Drywall / Real Ceiling
2. Make the drop ceiling look more attractive.
In the end we chose option #2. We had both an electrician and a plumber weigh in on whether or not we should go for the "real ceiling" look, and both said they wouldn't do it. In the ceiling of many basements lie all kinds of pipes and ducts and junk, and cutting yourself off from those things can only make for a headache down the line. Basically, you'll have to cut holes in your ceiling (and hope you can patch them up pretty well) if / WHEN something starts leaking or otherwise goes wrong. Us? We can pull out the tile, fix the problem, and pop the tile back in. If it gets damaged along the way, we can just buy a new one.
Another issue with option 1? More expensive. And our DIY skills didn't stretch that far. Plus, it's just a basement. A play room.
So, that left us with #2. Make the drop ceiling look more attractive. We toyed with the idea of making rectangle holes into square holes by adding some extra metal bars (and then buying square replacement tiles). Perhaps square tiles are a bit more up-to-date? But we added up the dough and it would have cost us at least $500 to do that. The extra metal bars + more expensive square tiles = NOT WORTH IT. To us, at least.
However, we could inexpensively update the look of the metal grid by simply painting over the ugly dark brown. We asked the paint shop folks, who sold us the correct kind of paint (we chose a light gray), and we covered up the 1985 look for about $15.
{Side note: when painting a ceiling, be sure to wear protective glasses. I was doing some touch ups, and got a big drop of gray paint IN MY EYE. In a panic I screamed for Josh to call poison control, sure I'd soon be getting fitted for a glass eye. IT HURT SO BAD. Gratefully the kind soul on the phone talked me down off the ledge and had me rinse out my eye in the sink. For 20 minutes. Folks, that's a long time to stand over a sink and allow water to rush onto your eyeball. But gratefully all was okay.}
For the ceiling tiles, we chose with the most basic, most boring white ones from Lowe's. Although they've got some pretty fancy options, we thought that it would be best to keep the visual focus off of the ceiling.
For the lighting, we elected to go with recessed can lights. Our electrician was able to get the correct equipment to attach them to the metal grid, and then he sawed holes into the our new tiles to pop the lights into them. Not bad!
Unfortunately for our pocket book, this was an expensive step. $100 per light times 13 of them. My electric skills stop at "install a new light fixture." For this job we were not only changing fixtures, but adding lights and changing locations. So, we ponied up. And the end effect is totally worth it. LET THERE BE LIGHT.
Yes, there just MIGHT be a coat of paint on those walls. More on that later.
If you'd like to see the true "before" pics, check here.
Monday, December 5, 2011
Fall 2011 Randomness
Now that we're out of the fall season (yay, Christmas season!) I thought it'd be fun to do a little recap of sorts as to what we've been up to. You know, since I would someday like to look back on Fall 2011 and not have to guess as to what we did.
1. Caroline has new tricks every day. It's exciting to sit and watch what new things she does. And then amusing-meets-aggravating the next moment, as she learns to pull all of the freshly-folded laundry out of the basket and into a heap on the floor. Or how to go after the toilet brush EVERY TIME she's in the bathroom. Love that kid. This post includes a gratuitous helping of pictures for any who are looking to pass the time.


2. I've started to do Bible Study Fellowship (BSF) for the first time. It's been way too long since I've done an in-depth study of the Bible and I'm grateful for the opportunity to do so now. AND they offer fabulous, FREE childcare. A huge, enormous, blessing. I need to add those ladies to my Christmas gift list.
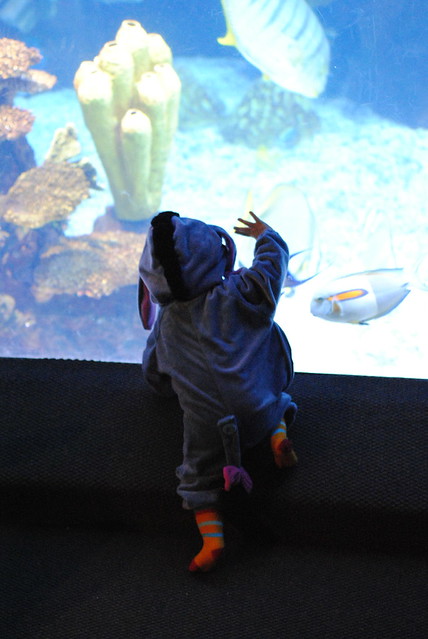
3. Our girl was Eeyore for Halloween. We enjoyed some "Boo at the Zoo" the weekend prior and then had our friends over for some quick Trick-or-Treating on the actual day. Our friends' baby, Mateo, was dressed as a lion, and mostly the kids sat and looked at each other.


Girlfriend loves her the aquarium.
Is it bad to go Trick-or-Treating for the following reasons: A) show off your baby, and B) get candy to eat yourself? Because that's exactly what we did.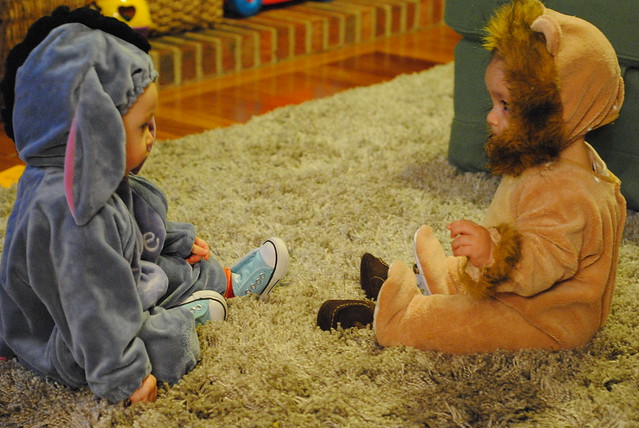
4. Josh's parents got Caroline (and us) a membership to COSI, the local science center/children's museum for her first birthday. We're big fans. It'll be so nice to have a place to bring a rowdy toddler this winter when playing outside isn't an option.
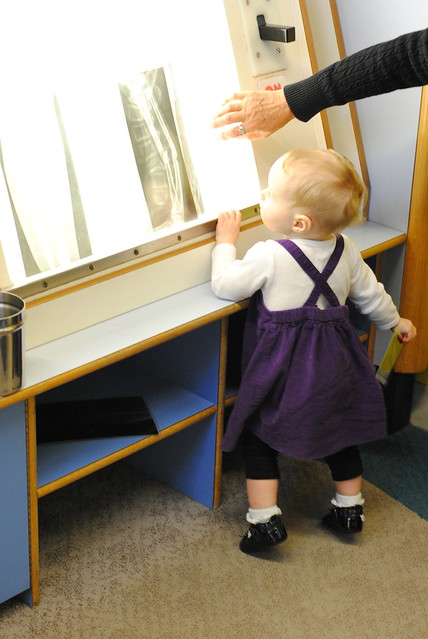
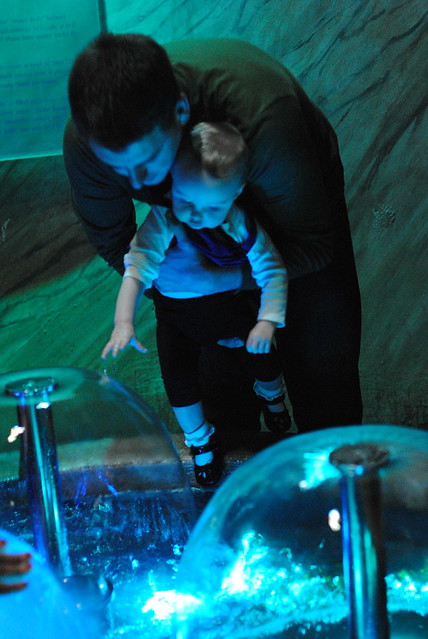
The water table is Caroline's one true love. I strip her down to a diaper and let her splish-splash away to her heart's content.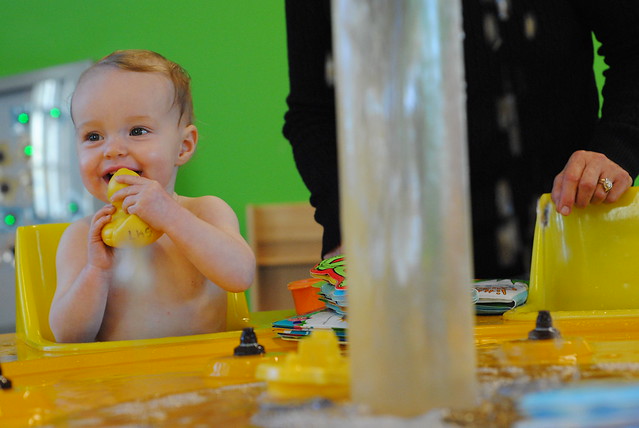


5. My friend Jamie (from college) made her annual visit in October. I's so nice to have friends that are willing to take their own time and money to come to visit you. Among other Columbus-area adventures, we went apple picking - a must!

Two years ago we went up to Cedar Point, which was a BIG bunch of fun. Last year I was 8+ months pregnant, so that wasn't going to happen. This year I was still nursing so didn't want to leave Caroline all day long. Maybe we can make another Cedar Point pilgrimage next year?
6. Caroline and I flew to Chicago in late October. Who knew - flying with an 11 month old is different than a 3 month old? My mom met us there to she could watch Caroline while I did some work stuff. And then we also got to see my cousin Michelle and her little girl, Inez. So fun.
And yes, I call Caroline the "purple people eater" when she's in her winter get-up.

Caroline was an old pro at the plane ride. For the first 45 minutes. I was just thankful that the flight to Chicago was only 50 minutes.

7. We discovered rotten subfloor in our master bath, next to and under our existing shower. So we've embarked on a very slow, mostly DIY bathroom project. What I've learned so far:
A. Demo is therapeutic.
B. It's always more expensive than you think it's going to be.
C. Drywall is a challenge.
D. The Internet is a DIYer's best friend.
Post-demo shot:

And here's where we're at today:

Done:
1. Demo of old shower and tile floor.
2. New subfloor is in.
3. New fixtures and drain are in.
4. Toilet taken out.
5. New shower pan installed.
6. New shower walls are in.
7. New drywall is up.
8. Drywall patching/mudding/sanding/etc is still (clearly!) in process.
To Do:
OH MY STARS TOO MUCH TO COUNT. But this list includes:
1. Finish drywall repair.
2. Tear out existing carpet.
3. Tile the entire floor.
4. Hook up the toilet again.
5. Paint the walls.
6. Take out the existing vanity.
7. Create a vanity out of a piece of furniture from IKEA. (I must be crazy.)
8. Replace light fixtures.
9. Install base trim.
Have you noticed that a simple problem of the need for a new subfloor, shower, and a very small amount of tile has ballooned into a full blown remodel? It's true. I am BOUND AND DETERMINED to do something about the ugly-as-sin vanity + light fixtures + curtain.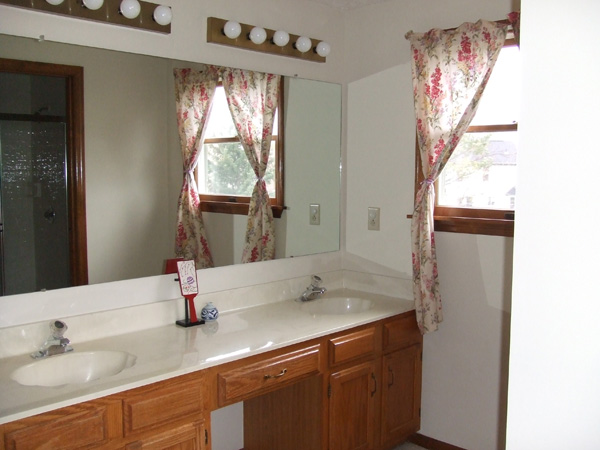
If you made it to the bottom of this post, I applaud you! In summary, Fall 2011 was a blast for the Browns. And we may never get our master bathroom back.
1. Caroline has new tricks every day. It's exciting to sit and watch what new things she does. And then amusing-meets-aggravating the next moment, as she learns to pull all of the freshly-folded laundry out of the basket and into a heap on the floor. Or how to go after the toilet brush EVERY TIME she's in the bathroom. Love that kid. This post includes a gratuitous helping of pictures for any who are looking to pass the time.
2. I've started to do Bible Study Fellowship (BSF) for the first time. It's been way too long since I've done an in-depth study of the Bible and I'm grateful for the opportunity to do so now. AND they offer fabulous, FREE childcare. A huge, enormous, blessing. I need to add those ladies to my Christmas gift list.
3. Our girl was Eeyore for Halloween. We enjoyed some "Boo at the Zoo" the weekend prior and then had our friends over for some quick Trick-or-Treating on the actual day. Our friends' baby, Mateo, was dressed as a lion, and mostly the kids sat and looked at each other.
Girlfriend loves her the aquarium.
Is it bad to go Trick-or-Treating for the following reasons: A) show off your baby, and B) get candy to eat yourself? Because that's exactly what we did.
4. Josh's parents got Caroline (and us) a membership to COSI, the local science center/children's museum for her first birthday. We're big fans. It'll be so nice to have a place to bring a rowdy toddler this winter when playing outside isn't an option.
The water table is Caroline's one true love. I strip her down to a diaper and let her splish-splash away to her heart's content.
5. My friend Jamie (from college) made her annual visit in October. I's so nice to have friends that are willing to take their own time and money to come to visit you. Among other Columbus-area adventures, we went apple picking - a must!
Two years ago we went up to Cedar Point, which was a BIG bunch of fun. Last year I was 8+ months pregnant, so that wasn't going to happen. This year I was still nursing so didn't want to leave Caroline all day long. Maybe we can make another Cedar Point pilgrimage next year?
6. Caroline and I flew to Chicago in late October. Who knew - flying with an 11 month old is different than a 3 month old? My mom met us there to she could watch Caroline while I did some work stuff. And then we also got to see my cousin Michelle and her little girl, Inez. So fun.
And yes, I call Caroline the "purple people eater" when she's in her winter get-up.
Caroline was an old pro at the plane ride. For the first 45 minutes. I was just thankful that the flight to Chicago was only 50 minutes.
7. We discovered rotten subfloor in our master bath, next to and under our existing shower. So we've embarked on a very slow, mostly DIY bathroom project. What I've learned so far:
A. Demo is therapeutic.
B. It's always more expensive than you think it's going to be.
C. Drywall is a challenge.
D. The Internet is a DIYer's best friend.
Post-demo shot:
And here's where we're at today:
Done:
1. Demo of old shower and tile floor.
2. New subfloor is in.
3. New fixtures and drain are in.
4. Toilet taken out.
5. New shower pan installed.
6. New shower walls are in.
7. New drywall is up.
8. Drywall patching/mudding/sanding/etc is still (clearly!) in process.
To Do:
OH MY STARS TOO MUCH TO COUNT. But this list includes:
1. Finish drywall repair.
2. Tear out existing carpet.
3. Tile the entire floor.
4. Hook up the toilet again.
5. Paint the walls.
6. Take out the existing vanity.
7. Create a vanity out of a piece of furniture from IKEA. (I must be crazy.)
8. Replace light fixtures.
9. Install base trim.
Have you noticed that a simple problem of the need for a new subfloor, shower, and a very small amount of tile has ballooned into a full blown remodel? It's true. I am BOUND AND DETERMINED to do something about the ugly-as-sin vanity + light fixtures + curtain.
If you made it to the bottom of this post, I applaud you! In summary, Fall 2011 was a blast for the Browns. And we may never get our master bathroom back.
Friday, August 5, 2011
Getting some photos off the dang computer.
As you're probably aware, I like to fiddle around with my camera. I especially enjoy capturing the little life of our girl - as many moments as I can.
But then, I get SO MANY pictures. Like these. And these:

Sure, they're fun pictures of Caroline. But if I have them all printed in 4x6's I KNOW they'll just sit in a folder and rot.
Let me tell you, I get really overwhelmed by a bunch of pictures sitting on my hard drive. So overwhelmed that they sit there for a long time, untouched. I can hardly bring myself to even weed out the bad ones. Clearly, it's not the best strategy.
However, I'm making a few strides. Here are some things I'm currently working on, and am pushing myself to keep up with:
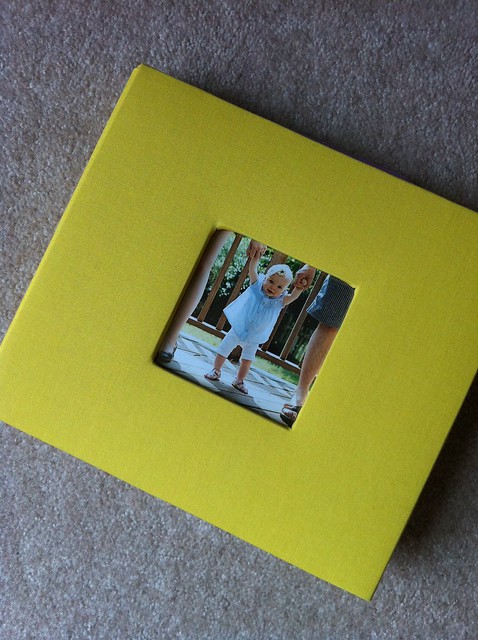
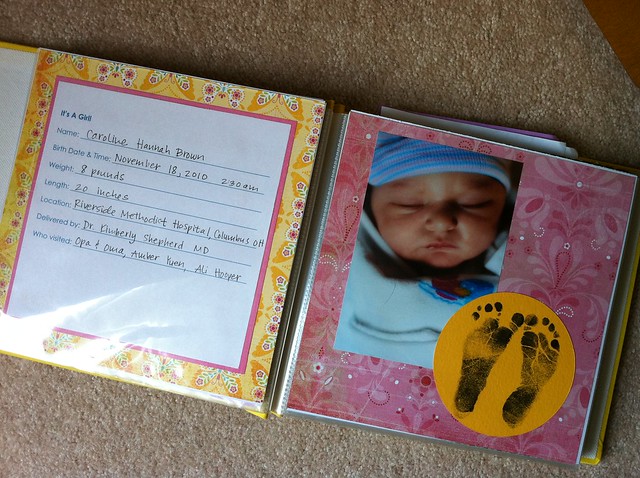
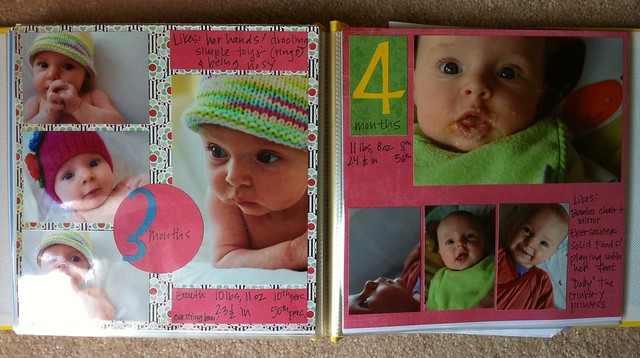
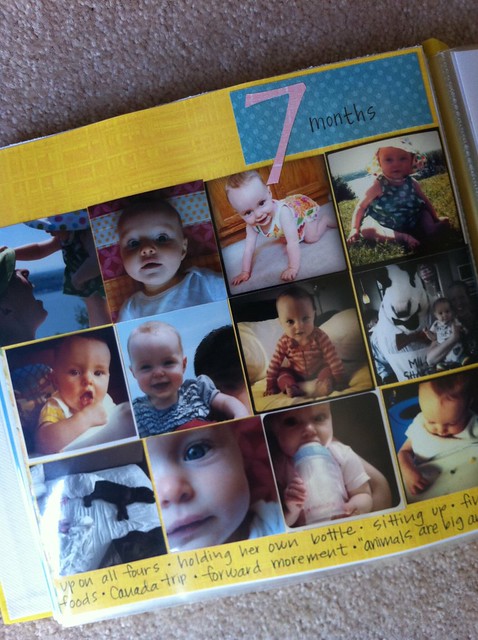
1. Caroline's Baby Book. A traditional scrapbook, which I'm trying to keep simple and sweet. Birth stats. Milestones. A few notes about each month. Pictures with each grandparent and great-grandparent.
[Don't mind the grainy iPhone shots, by the way]
2. Shutterfly Photo Books. I'm just starting this one, but it gives me a chance to get a bunch of pictures into a single book, QUICKLY AND EASILY. For 2011, I think I'll make a Caroline-specific one, and a broader book of our family's adventures.
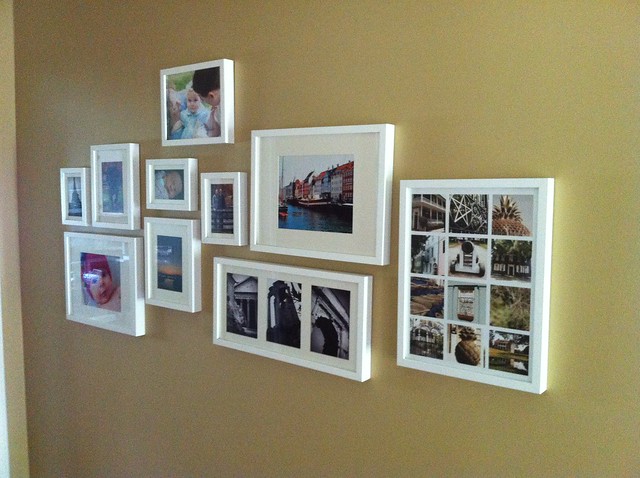
3. Up on the wall. I, along with the rest of the Internet, was inspired by this post. So we took a baby step and put up a few photos. I wanted family shots, and Josh wanted vacation pics. You see the result.
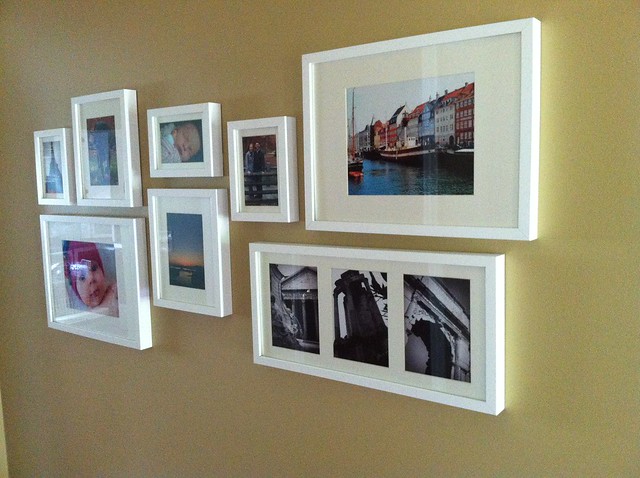
We've included a variety of pictures, including three from Rome, one from Oregon, one from Paris, and another from Copenhagen. As far as family shots go, we've got one of Riley in our backyard, one of me and Josh in Bloomington, IN, and two of Caroline.
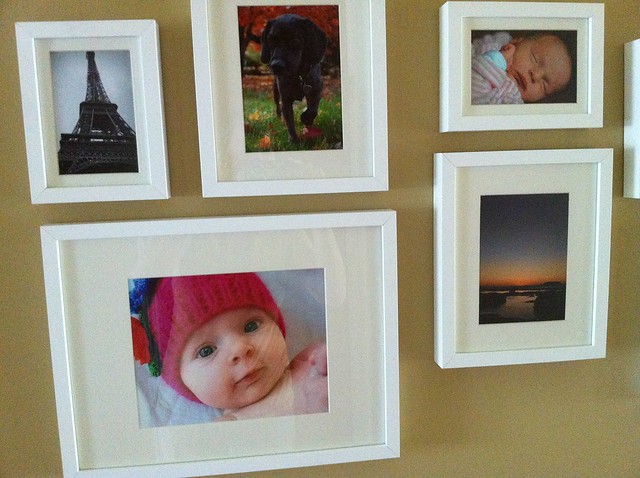
We figure we can add to it here and there with updated photos, and expand the collection.
This is a stretch of hallway that connects the front door with the kitchen.

And do you remember my Charleston photo project? I enjoyed putting those together so much that I couldn't choose just one or two. So...
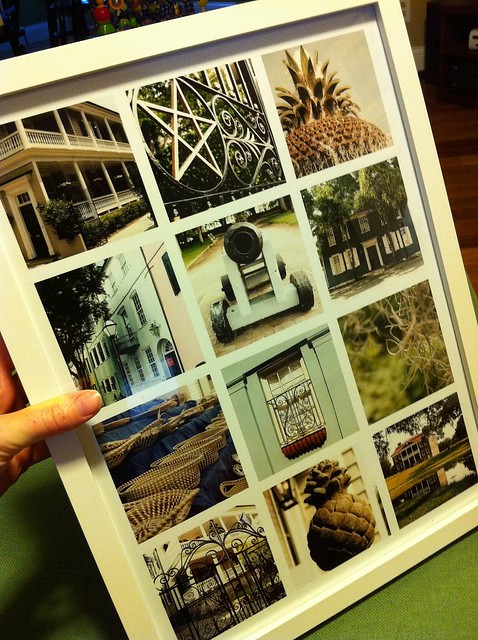
So we just added to the wall this week:
Both the Charleston collage AND one from Caroline's 6 Month photo shoot were added.
I look forward to adding to this wall... and hope to add some non-photos, too. A big "B," perhaps? A framed key to our first house? Caroline's future artwork? Extra-special concert tickets or something? We'll see.
So, those are the steps I'm taking to actually, you know, use our pictures. And I'm curious... what do you do with all of yours?
But then, I get SO MANY pictures. Like these. And these:
Sure, they're fun pictures of Caroline. But if I have them all printed in 4x6's I KNOW they'll just sit in a folder and rot.
Let me tell you, I get really overwhelmed by a bunch of pictures sitting on my hard drive. So overwhelmed that they sit there for a long time, untouched. I can hardly bring myself to even weed out the bad ones. Clearly, it's not the best strategy.
However, I'm making a few strides. Here are some things I'm currently working on, and am pushing myself to keep up with:
1. Caroline's Baby Book. A traditional scrapbook, which I'm trying to keep simple and sweet. Birth stats. Milestones. A few notes about each month. Pictures with each grandparent and great-grandparent.
[Don't mind the grainy iPhone shots, by the way]
3. Up on the wall. I, along with the rest of the Internet, was inspired by this post. So we took a baby step and put up a few photos. I wanted family shots, and Josh wanted vacation pics. You see the result.
We've included a variety of pictures, including three from Rome, one from Oregon, one from Paris, and another from Copenhagen. As far as family shots go, we've got one of Riley in our backyard, one of me and Josh in Bloomington, IN, and two of Caroline.
This is a stretch of hallway that connects the front door with the kitchen.
And do you remember my Charleston photo project? I enjoyed putting those together so much that I couldn't choose just one or two. So...
So we just added to the wall this week:
Both the Charleston collage AND one from Caroline's 6 Month photo shoot were added.
I look forward to adding to this wall... and hope to add some non-photos, too. A big "B," perhaps? A framed key to our first house? Caroline's future artwork? Extra-special concert tickets or something? We'll see.
So, those are the steps I'm taking to actually, you know, use our pictures. And I'm curious... what do you do with all of yours?
Friday, April 8, 2011
The Basement Project: Trash Removal
Random unrelated tangent: Blogger tells me I've had 600 posts! Holy Cow.
Back to the (somewhat boring) basement update.
Remember this? See the first picture in particular.
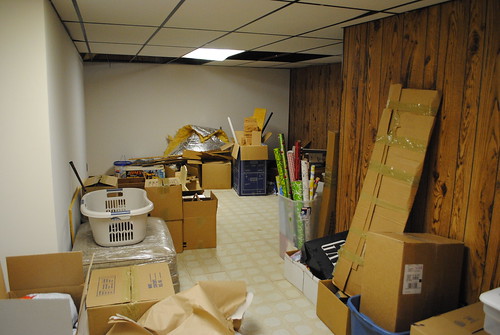
Well, we had a bunch of junk down there. Random 2x4's (thank you previous owners!) Boxes of childhood memorabilia (thank you Mom and Dad!) Assorted old suitcases, furniture and books (thank you us!)
Oh, and materials that we were replacing. Floor tiles and ceiling tiles, mostly. And an ugly bathroom vanity + mirror.
All this adds up to a serious need to purge. We saved a lot of mementos from our childhoods and our wedding, and stored them neatly in the unfinished room. And then what was left - and salvageable - went to Goodwill. But my old Psychology 100 notes? Stained ceiling tiles? No one wants those. We needed a trash strategy, as we had a crap-load of, well, crap to get rid of. Enter Bagster.
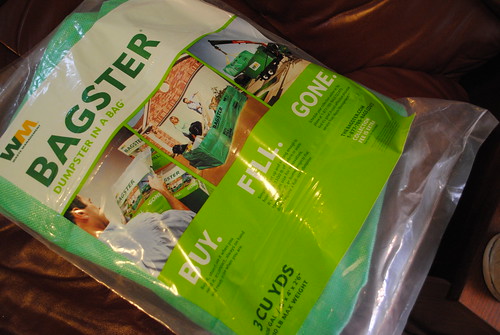
We picked up two of these bags at Lowe's. I think they were $29 each. They come in these very manageable packages, and then it's up to you to set them up in your driveway.
Setting them up is super easy. It basically involves unfolding a large green bag.
And then, we filled 'em up.
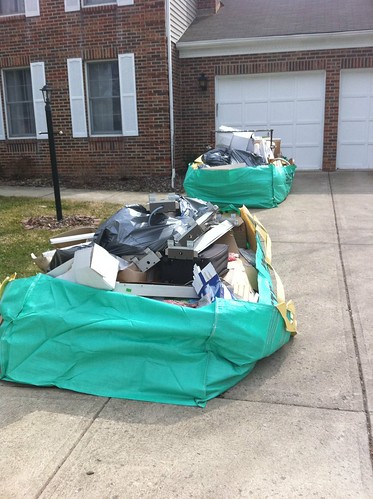
And then, we let them sit in our driveway for two months. Yes, it was classy.
Thankfully our next door neighbors were doing a remodeling job of their own, and had a tub and toilet in their front yard at the same time.
We were teaming up to raise property values in the area. Clearly.
When we FINALLY got around to it, we went to Bagster's website and arranged for a pick up of the bags. The first one was $89 and the second was $69. If we'd had a third or fourth, they'd have been $69 each, too. Just over $200 seemed pretty reasonable to us for major trash pick up!
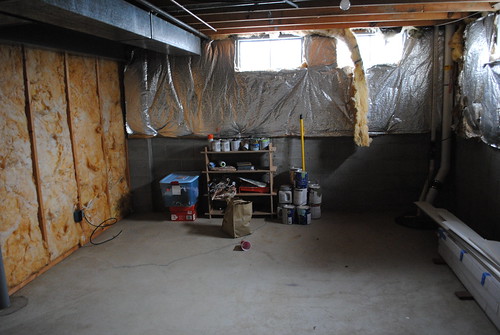
And then, we were left with a clean slate in the basement. Ready for painting.
Back to the (somewhat boring) basement update.
Remember this? See the first picture in particular.
Well, we had a bunch of junk down there. Random 2x4's (thank you previous owners!) Boxes of childhood memorabilia (thank you Mom and Dad!) Assorted old suitcases, furniture and books (thank you us!)
Oh, and materials that we were replacing. Floor tiles and ceiling tiles, mostly. And an ugly bathroom vanity + mirror.
All this adds up to a serious need to purge. We saved a lot of mementos from our childhoods and our wedding, and stored them neatly in the unfinished room. And then what was left - and salvageable - went to Goodwill. But my old Psychology 100 notes? Stained ceiling tiles? No one wants those. We needed a trash strategy, as we had a crap-load of, well, crap to get rid of. Enter Bagster.
We picked up two of these bags at Lowe's. I think they were $29 each. They come in these very manageable packages, and then it's up to you to set them up in your driveway.
Setting them up is super easy. It basically involves unfolding a large green bag.
And then, we filled 'em up.
And then, we let them sit in our driveway for two months. Yes, it was classy.
Thankfully our next door neighbors were doing a remodeling job of their own, and had a tub and toilet in their front yard at the same time.
We were teaming up to raise property values in the area. Clearly.
When we FINALLY got around to it, we went to Bagster's website and arranged for a pick up of the bags. The first one was $89 and the second was $69. If we'd had a third or fourth, they'd have been $69 each, too. Just over $200 seemed pretty reasonable to us for major trash pick up!
And then, we were left with a clean slate in the basement. Ready for painting.
Wednesday, March 23, 2011
Finally!
I have a confession to make.
Josh got me these frames for Christmas, and I haven't put anything in them until now.
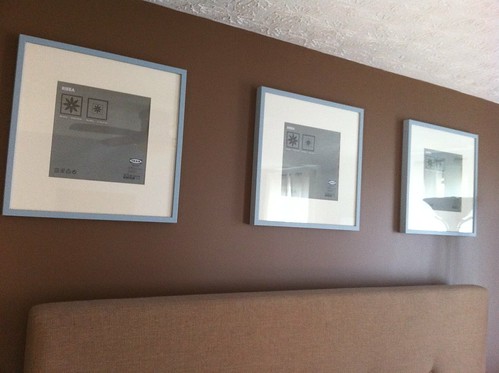
And no, not Christmas 2010. Christmas 2009.
Which means that we've had unfilled picture frames hanging over our bed for well over a year.
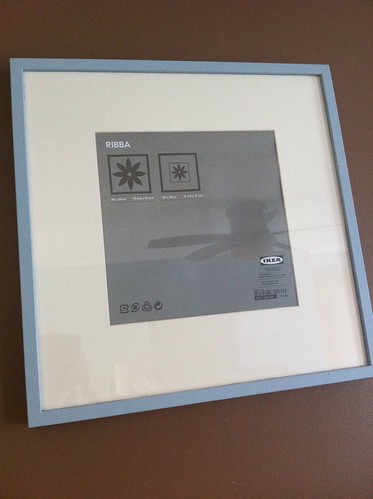
A year of seeing only the basic IKEA messaging. A year of unfinished-ness. A year where we traveled, worked on other house projects, and took lots of pictures.
Part of the problem was indecision. What to fill them with? We originally thought vacation pictures. Then family pictures. And although we looked through countless folders, the right photos never presented themselves. And we'd always thought that they should be somehow related, and close-ups. And then that made the picture hunting even more difficult.
The other part of the problem was the fact that we mostly don't care what our bedroom looks like. We don't make our bed. There are usually dirty clothes on our floor. There is a layer of dust on the furniture. I know, I know. I'm a terrible house keeper. Judge all you want. It's the simple truth. We'll work hard to clean the main floor when we have company over, but no one besides us ever sees our bedroom, and so we just lack motivation to keep it neat.
Maybe someday.
I have hopes of changing my ways. Hasn't happened yet.
Anyway, where was I?
Frames. Yes.
We finally, finally settled on the idea of a pattern instead of a photo. Once again I drew inspiration from these guys, who reminded me that you can just fill frames with paper. Who knew?
So Caroline and I headed over to the nearest Archiver's and bought $9 worth of coordinating paper. I didn't choose them all from the same brand or line of paper so that they'd be different. Not too matchy-matchy. And I tried to choose a few different kinds of patterns. I'm a sucker for polka dots and have to force myself to choose other patterns from time to time. I was hopeful that they'd just flow together.
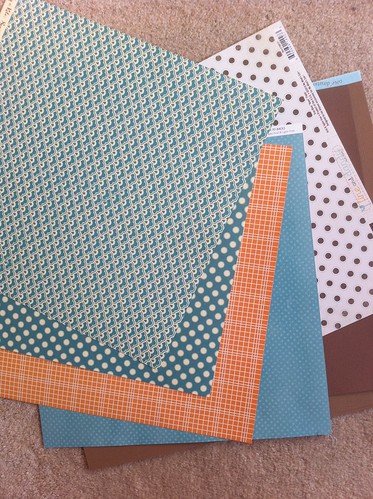
For the record, Archiver's has WAY better paper than Michael's or Hobby Lobby.
I took 'em home and started cutting a bunch of circles using my handy dandy circle cutter. Then I experimented with a bunch of different configurations and ended up with a set that I liked.
And here's what I came up with:
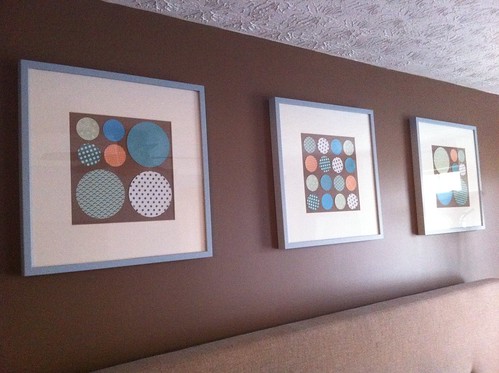
Paper circles + glue stick + brown paper.
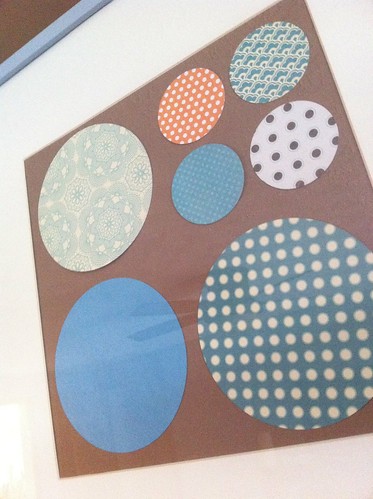
Simple. Easy. I'm not 100% in love, but I sure am relieved to have something in those frames. Especially something that only cost $9.
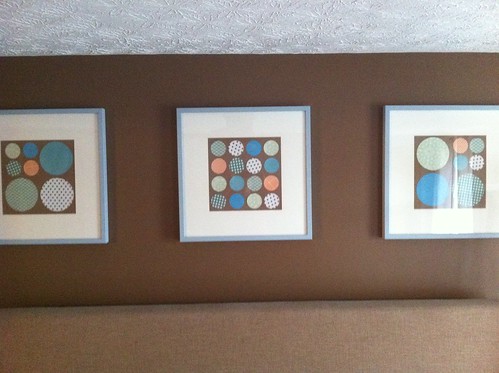
One of these days I'll take a full bedroom shot so that you can get the full effect.
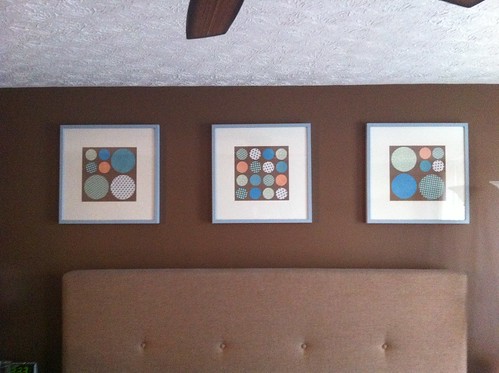
But since the room is messy (see confessions above) you'll just have to wait.
Josh got me these frames for Christmas, and I haven't put anything in them until now.
And no, not Christmas 2010. Christmas 2009.
Which means that we've had unfilled picture frames hanging over our bed for well over a year.
Part of the problem was indecision. What to fill them with? We originally thought vacation pictures. Then family pictures. And although we looked through countless folders, the right photos never presented themselves. And we'd always thought that they should be somehow related, and close-ups. And then that made the picture hunting even more difficult.
The other part of the problem was the fact that we mostly don't care what our bedroom looks like. We don't make our bed. There are usually dirty clothes on our floor. There is a layer of dust on the furniture. I know, I know. I'm a terrible house keeper. Judge all you want. It's the simple truth. We'll work hard to clean the main floor when we have company over, but no one besides us ever sees our bedroom, and so we just lack motivation to keep it neat.
Maybe someday.
I have hopes of changing my ways. Hasn't happened yet.
Anyway, where was I?
Frames. Yes.
We finally, finally settled on the idea of a pattern instead of a photo. Once again I drew inspiration from these guys, who reminded me that you can just fill frames with paper. Who knew?
So Caroline and I headed over to the nearest Archiver's and bought $9 worth of coordinating paper. I didn't choose them all from the same brand or line of paper so that they'd be different. Not too matchy-matchy. And I tried to choose a few different kinds of patterns. I'm a sucker for polka dots and have to force myself to choose other patterns from time to time. I was hopeful that they'd just flow together.
For the record, Archiver's has WAY better paper than Michael's or Hobby Lobby.
I took 'em home and started cutting a bunch of circles using my handy dandy circle cutter. Then I experimented with a bunch of different configurations and ended up with a set that I liked.
And here's what I came up with:
Paper circles + glue stick + brown paper.
Simple. Easy. I'm not 100% in love, but I sure am relieved to have something in those frames. Especially something that only cost $9.
One of these days I'll take a full bedroom shot so that you can get the full effect.
But since the room is messy (see confessions above) you'll just have to wait.
Tuesday, March 15, 2011
The Basement Project: Tour
We've been itching to work on our outdated, semi-functional basement for a while now. Like practically since we moved in.
There's a lot of space. The entire footprint of our main floor is down there, and 3/4 of it is finished. So that's always been really nice.
However, in no way did we ever want to go down there.
The problems:
1. Lighting. Dim/broken florescent tubes behind dirty sheets of plastic.
2. Flooring. Stick-on tiles that had lost their stick.

3. Walls. Lots of fake wood paneling. Yuck.
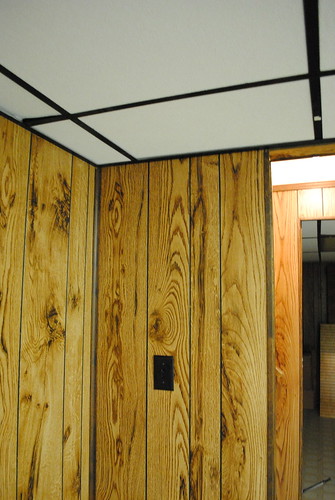
4. Ceiling. A drop ceiling with old, stained panels. And a dark brown metal grid. Awesome. Oh, and since a water pipe to the outside burst last year, we'd lost a few panels to water damage.
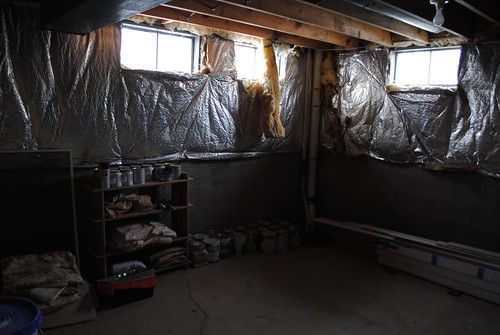
5. Filled with junk. As seen in picture #1. Some of our own, some left behind by the previous owners. Lovely.
We set out to tackle each of these problems. On a budget, of course. And we'll cover the various aspects of the remodel in subsequent posts.
But first, let me take you on a little "before" tour. Squint your eyes and think about what could be.
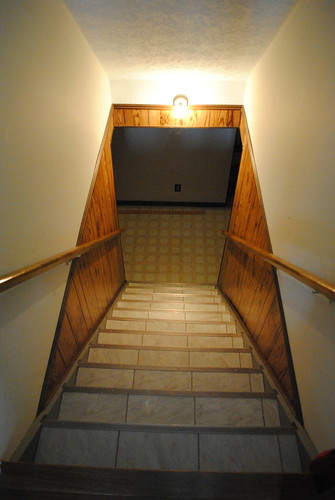
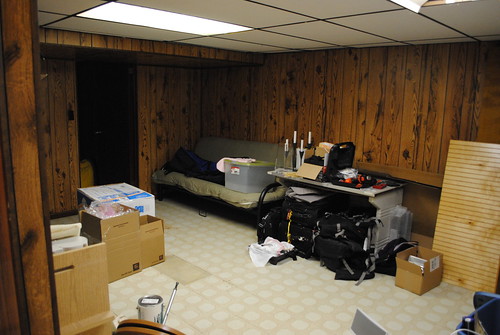
First, you walk down the stairs. Steep ones! You a little taste of paneling and ugly lighting on your way down.
Turn right. You're in the biggest of the three finished rooms. Someday we'll put a couch and a bunch of toys down here.
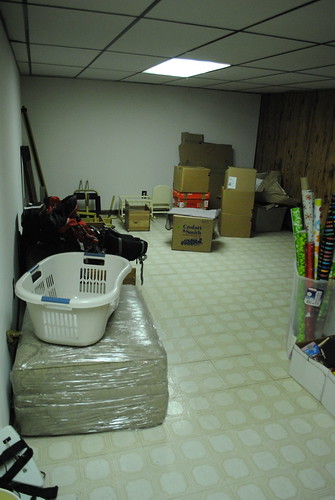
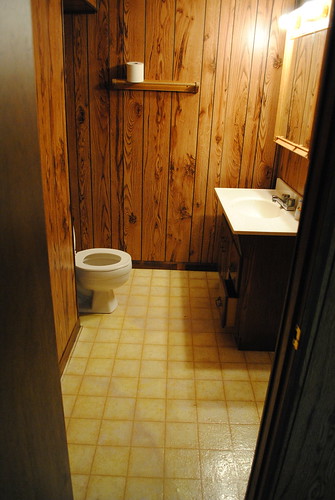
Walk into the room and to the right, past the wrapping paper, and you'll see a door to the little half bath.
Walk back into the playroom, and you'll find a door to the unfinished room. Yay, storage! This one isn't changing much. Save adding some of our storage stuff from the other 3 rooms. You know... suitcases, Christmas decorations, half-used paint cans, sentimental wedding paraphernalia, etc.
If you head back to the bottom of the stairs, and turn left (instead of right) you'll find yourself here:
We're not sure what we'll do with that space. If we're here long enough, maybe will spring for a ping pong table? We'll see.
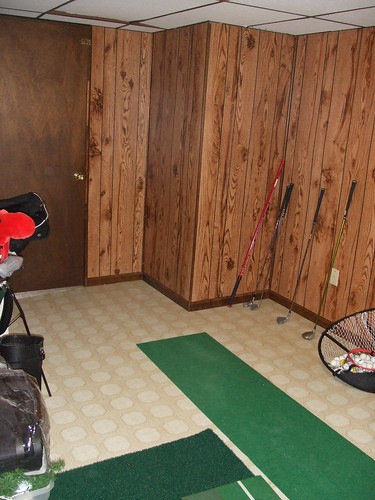
And then if you walk through the ping pong room, you'll find finished room #3. This picture was taken when we toured the house for the first time. Apparently the previous owner used it as putting practice. We'd like to find some used exercise equipment and put it in there.
If you walked through the exercise room and opened the far door, you'd find yourself back in the unfinished space. Clear as mud? Good.
There's a lot of space. The entire footprint of our main floor is down there, and 3/4 of it is finished. So that's always been really nice.
However, in no way did we ever want to go down there.
The problems:
1. Lighting. Dim/broken florescent tubes behind dirty sheets of plastic.
2. Flooring. Stick-on tiles that had lost their stick.
3. Walls. Lots of fake wood paneling. Yuck.
4. Ceiling. A drop ceiling with old, stained panels. And a dark brown metal grid. Awesome. Oh, and since a water pipe to the outside burst last year, we'd lost a few panels to water damage.
5. Filled with junk. As seen in picture #1. Some of our own, some left behind by the previous owners. Lovely.
We set out to tackle each of these problems. On a budget, of course. And we'll cover the various aspects of the remodel in subsequent posts.
But first, let me take you on a little "before" tour. Squint your eyes and think about what could be.
First, you walk down the stairs. Steep ones! You a little taste of paneling and ugly lighting on your way down.
Turn right. You're in the biggest of the three finished rooms. Someday we'll put a couch and a bunch of toys down here.
Walk into the room and to the right, past the wrapping paper, and you'll see a door to the little half bath.
Walk back into the playroom, and you'll find a door to the unfinished room. Yay, storage! This one isn't changing much. Save adding some of our storage stuff from the other 3 rooms. You know... suitcases, Christmas decorations, half-used paint cans, sentimental wedding paraphernalia, etc.
If you head back to the bottom of the stairs, and turn left (instead of right) you'll find yourself here:
We're not sure what we'll do with that space. If we're here long enough, maybe will spring for a ping pong table? We'll see.
And then if you walk through the ping pong room, you'll find finished room #3. This picture was taken when we toured the house for the first time. Apparently the previous owner used it as putting practice. We'd like to find some used exercise equipment and put it in there.
If you walked through the exercise room and opened the far door, you'd find yourself back in the unfinished space. Clear as mud? Good.
Subscribe to:
Posts (Atom)