So earlier this week our kitchen was mentioned on
Young House Love and it drew all kinds of visitors to this here blog. I've never seen such bloggy traffic! It's exciting for little bloggers like me.
(And if you're new here, welcome!)
And since that YHL post, I've gotten all kinds of kitchen-related questions that I'm going to attempt to answer.
First, here are some kitchen-ish posts you may have missed:
Scenes from when we first moved in:
ProgressPainting:
Color SplashOur black table & chairs:
DIY Project #1 of 32453Before/after light fixtures:
The Difference a Light Fixture MakesThe curtain over the sink:
The Master SeamstressThe in-between stage:
Kitchen In ProgressAnd of course, the final product:
The KitchenWe spent our $400 on an electric sander, a jig saw, cabinet hardware, primer, white paint, oil-rubbed bronze spray paint, liquid nails, "real" nails, and beadboard. We'd already taken care of things like hardwood floors, light fixtures, stools, table & chairs, curtains, etc. prior to starting the cabinet paining process.

So... on to the details of "how" we accomplished this.
Step 1: Dismantle the kitchen
My very, very sweet husband did the first few steps all by his lonesome while I was visiting friends in D.C. What a guy! First he emptied all of the cupboards and stashed all of our kitchen crap in the dining room. He then used an electric drill (with a screwdriver bit attached) to take off each of the cupboard doors. And he pulled out all of the drawers. The kitchen definitely looked skeleton-ish.
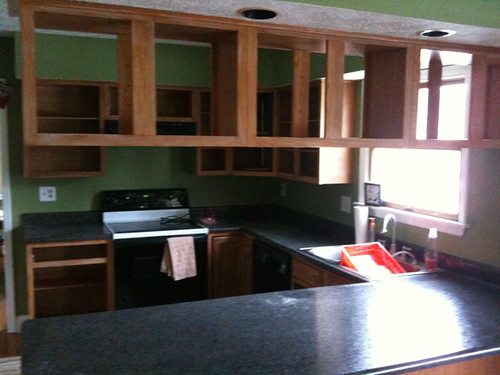
At some point he also took off all the hinges and hardware, putting all of the pieces in a bag for safe keeping.
Step 2: Sand 'er down
Josh spent $20 or so on an electric sander and bought a fairly fine grain of sandpaper to go with it. He sanded down the cupboard "bones," the fronts of the drawers, and both sides of the cabinet doors. As I understand it, this helps to make wooden surfaces more tacky and thus helps the paint stick. Our cabinets, prior to sanding, had a high gloss finish, so it was good to get 'em a little roughed up.
Step 3: Prime Time
I don't know what kind of primer we used, but I'm sure it went something like this:
Josh went to the store, described the project, and bought what was recommended. He primed everything. Bones, inside, outside, up, and down.

We'd made the decision to paint inside the cabinets for a couple of reasons. One, they were looking dingy. Two, we knew it'd be hard to stop and make a nice, neat line where the painting stopped. So of course we primed where we planned to paint.
He used one coat of primer.
Step 4: Painting
I actually helped with this part. (Crazy - I know!)
Josh put on coat #1 while I was still gone. He used both a paintbrush (for the tighter spots) and a small roller (for the larger, flat parts). The roller was recommended by the paint store and designed specifically for cabinet painting.
Painting the cabinet bones was easy enough, but painting inside everything was VERY time consuming. Just a warning! Put on a good audio book while you're doing this!
Josh set up a mini paint shop for all of the cabinet doors in our basement, using old paint cans as platforms. I'm pretty sure a large part of The Tudors: Season 1 was watched from the comfort of our unfinished basement room that weekend. To tackle the cupboard doors, he first used the brush to get paint into the grooves. He then used the roller on the other parts. Once side one was dry, he'd flip them over and start again.
I helped with coat #2. Josh was fed up with painting inside the cupboards by that point so I tackled that. We ended up doing a "touch up" coat later on as well.
Step 5: Spray paint the hinges
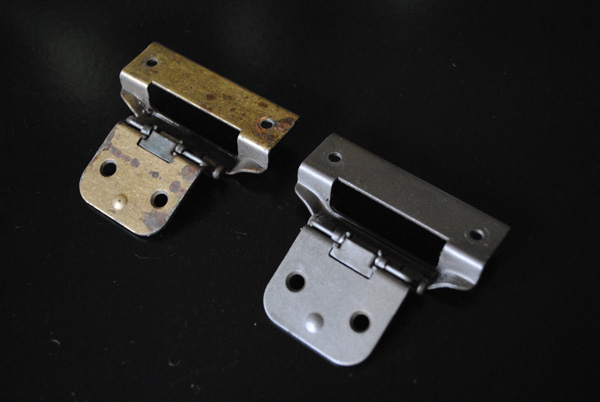
This was easy, but in retrospect I'd do a better job of painting them from different angles. As in spray one side. Dry. Flip. Spray other side. Dry. Bend hinge. Spray. Dry. Flip. Spray. Dry. Bend another way. Spray. Dry.
I definitely found a few places where I hadn't done the most complete spray painting job.
Step 6: Put the kitchen back together
Using our drill once again, and our painted hinges, we put the cupboards back together. We also put down some shelf liner paper and put away our kitchen equipment.
It was at this point that we saw some thin places that needed an extra coat of paint. So we spot-checked and rolled more paint on the cupboards where necessary.
Step 7: Install Hardware
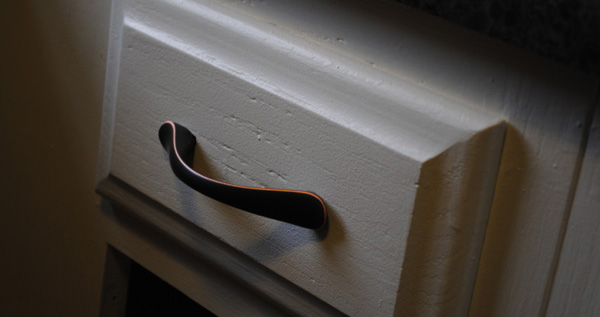
We didn't spray paint our old stuff here, because we just didn't like the shape. So we spent about $100 at Home Depot buying new cabinet handles and drawer pulls that fit our style. We just made sure the new ones would fit in the old holes.
Step 8: The Beadboard project
Okay, this has it's own step-by-step process, and I'll leave it for a future post. Stay tuned!
Any further questions regarding this part of our project? Ask away!
And because many of you have asked, here's our source list:
Green Paint - Benjamin Moore Mountain Lane
White Paint - Sherwin Williams West Highland White
Light fixture - The Great Indoors (and it wasn't cheap)
Bar Stools - Target (they
were pretty cheap)
Kitchen Table - Bought from friends, garage sale style
Kitchen Table black paint - no idea, but we did just walk into a hardware store, describe the project, and bought the paint they recommended - in black.
Curtain - homemade from a West Elm duvet cover
Drawer pulls/cabinet handles - Home Depot
Beadboard - Lowe's