Showing posts with label Crafts. Show all posts

Wednesday, February 15, 2012

Freezer Paper Stenciling

Like the rest of the world, it seems, I've been enjoying Pinterest.  And my latest Pinterest-induced crafting interest?
Freezer Paper3
Let me just tell you, this is SO EASY.  SO FUN.  SO ADDICTING.

I stumbled across this link, which first caught my interest because it was about how to DIY Disney t-shirts for your kids.  And I just happened to be in the midst of planning a trip to Disney.  Score.


In a nutshell, here's how it works.
Tools Needed:
Freezer paper - NOT wax paper (find it near aluminum foil at the grocery store)
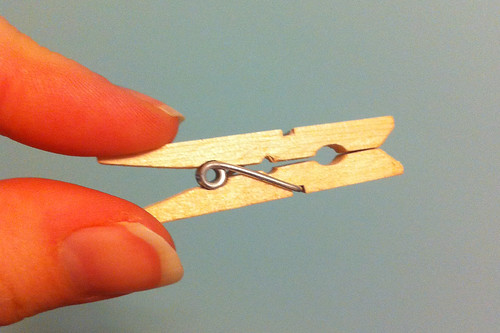
Craft knife
Fabric paint - find it at any craft store.
T-shirt (or whatever you plan to stamp your image onto)... I've found nice options at thrift stores and Wal-Mart.

Instructions:
1. Find an image you want to use.

For me, that has meant scrolling through google images and selecting some nice, simple options.  Either that or finding a font I like and printing off a letter/word.  {Otherwise jump to #2 and just draw an image onto freezer paper.}

2. Trace the image onto freezer paper.

3. Using an inexpensive craft knife, cut out the image to create a custom stencil.

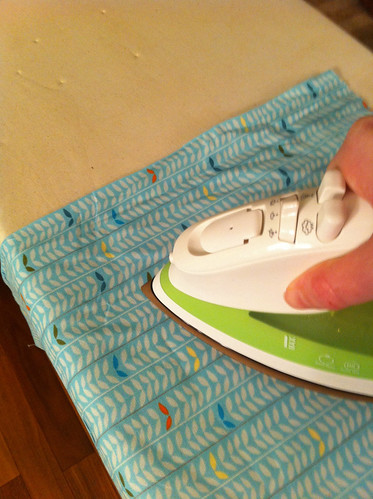
4. Iron the freezer paper image onto your t-shirt.

5. Using a cheap foam paint brush, dab fabric paint onto your stencil/t-shirt.  You'll want to let your initial coat dry and then add another layer.  I've found that 3-4 coats works well.

6. Let it dry for at least 4-5 hours, and then peel off the freezer paper.

VOILA.  Custom shirt.  And you don't even need to sew.

I made this one - Pluto was my favorite Disney character as a child.
2012 Random

My mom made this one:
MM
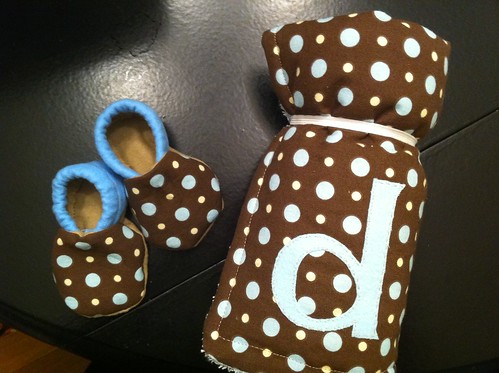
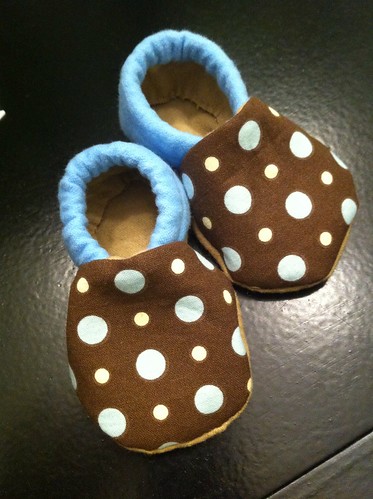
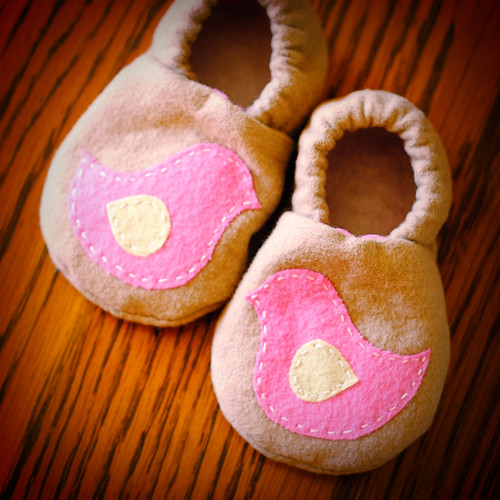
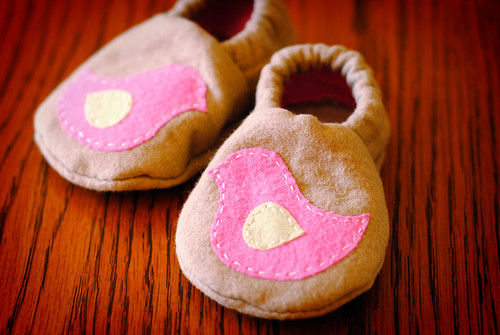
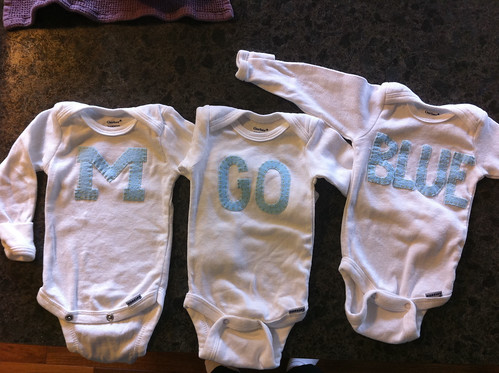
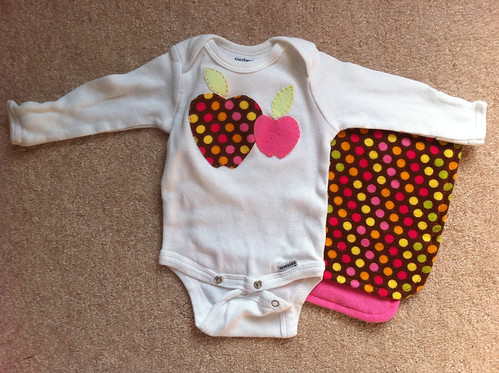
I've also made several birthday/baby gifts.  Like I said, I'm hooked.

I've stumbled across a few more examples of this technique... fun, aren't they?

Wednesday, March 23, 2011

Finally!

I have a confession to make.

Josh got me these frames for Christmas, and I haven't put anything in them until now.


And no, not Christmas 2010. Christmas 2009.

Which means that we've had unfilled picture frames hanging over our bed for well over a year.

A year of seeing only the basic IKEA messaging. A year of unfinished-ness. A year where we traveled, worked on other house projects, and took lots of pictures.

Part of the problem was indecision. What to fill them with? We originally thought vacation pictures. Then family pictures. And although we looked through countless folders, the right photos never presented themselves. And we'd always thought that they should be somehow related, and close-ups. And then that made the picture hunting even more difficult.

The other part of the problem was the fact that we mostly don't care what our bedroom looks like. We don't make our bed. There are usually dirty clothes on our floor. There is a layer of dust on the furniture. I know, I know. I'm a terrible house keeper. Judge all you want. It's the simple truth. We'll work hard to clean the main floor when we have company over, but no one besides us ever sees our bedroom, and so we just lack motivation to keep it neat.

Maybe someday.

I have hopes of changing my ways. Hasn't happened yet.

Anyway, where was I?

Frames. Yes.

We finally, finally settled on the idea of a pattern instead of a photo. Once again I drew inspiration from these guys, who reminded me that you can just fill frames with paper. Who knew?

So Caroline and I headed over to the nearest Archiver's and bought $9 worth of coordinating paper. I didn't choose them all from the same brand or line of paper so that they'd be different. Not too matchy-matchy. And I tried to choose a few different kinds of patterns. I'm a sucker for polka dots and have to force myself to choose other patterns from time to time. I was hopeful that they'd just flow together.


For the record, Archiver's has WAY better paper than Michael's or Hobby Lobby.

I took 'em home and started cutting a bunch of circles using my handy dandy circle cutter. Then I experimented with a bunch of different configurations and ended up with a set that I liked.

And here's what I came up with:


Paper circles + glue stick + brown paper.


Simple. Easy. I'm not 100% in love, but I sure am relieved to have something in those frames. Especially something that only cost $9.


One of these days I'll take a full bedroom shot so that you can get the full effect.


But since the room is messy (see confessions above) you'll just have to wait.

Tuesday, December 28, 2010

Antique Cradle

We've got an awesome antique cradle at our house. It isn't any antique, either. My mom slept in this cradle. So did I, as well as a number of other family members.

1208_2845

How cool is that?

While beautiful, it did need a little bit of TLC when I first got it. Not much, thankfully.
1124_2179

It's been a recent project of mine. A fun one, I might add.

First up, the mattress was in a bit of disrepair. The solution was a waterproof tablecloth. I just taped it in place with some packaging tape.
1124_2184

That way if she spits up/pees/etc. when she's in there, it'll be easy to wipe off.

Then I just needed to make a sheet for it. I thought flannel would be nice and cozy, and it was on a major sale at JoAnn's the day I went in there.

Unfortunately it was just a little too narrow to fully wrap around.
1206_3056

The solution? A simple patch. The one i made is pretty crude, obviously. But since it'll only be on the underside of the mattress, it works just fine.
1207_3046

Also, the cradle swings. A lot. Too much to be safe for a wiggly little girl. So we bound it to the frame with some plastic ties.
1208_2833

And then covered those in ribbon.
1208_2843

And now?
1208_2839

It's beautiful. And functional. And I love that this cradle has been used by many of us over the years.

We've got a great spot for Caroline to hang out.
1208_2924

Or have some tummy time.
1208_2850

1208_2854

Or nap. Or gaze at Christmas tree lights.
1209_2823

She likes it.
1209_2811-1

Thursday, December 16, 2010

Christmas Card Craft

I love, love, love Christmas cards. Especially the kind that come in the mail. For me, they're a wonderful reminder of the incredible blessing of friends and family, and I so appreciate each one. I get so excited for the mail to come every day, it's like I'm a little kid.

Since they cards so cheerful and colorful and fun, I feel it would be a shame to keep them in a stack, box, or basket. The solution around here?

Hang them over the doors in our kitchen. With mini clothes pins. Festive ones.

They're very easy to make. Crazy easy.

Step One: Buy clothes pins. This was the hardest part!
1214_3143

Step Two: Find some paper you like. I found these in my scrap box and figured they were all holiday-ish enough to suit me.
1214_3141

Step Three: Cut strips of paper to the size of the front of your clothes pin. Mine happened to be 1 3/4 inches by 1/4 inch. Once I'd cut some of the paper I realized that the pattern didn't translate well onto such a small space. So I didn't use those.
1214_3147
1215_3135
Step Four: Glue the paper onto the clothes pins. Let it dry some.
1214_3154

Aaaannndddd.... DONE!
1215_3134
1214_3150-1

To hand up the cards, I cut some ribbon and tacked it to the door trim with clear push pins. Then my little clothes pin beauties keep the cards in place.

1216_3123
1216_3128
1216_3124
Fun and easy.

Thursday, November 11, 2010

Taggie Blanket

Continuing on with my sewing streak...

We've got a "taggie blanket." Blanket seems like a stretch to me since it is somewhere around 1 foot long. What else do you call these things?


Easy, easy, easy to make. Try one. Directions here.


All you need is 2 small pieces of fabric + some ribbon. I had these fabrics on hand, and ribbon was 1/2 off at Hobby Lobby this week.

I think I'll wrap this one up and give it to her for Christmas. Just for fun.

Sunday, November 7, 2010

Baby Shoes

Yes, I'm still sewing. No, our baby hasn't yet arrived.

There's a significant connection there, not surprisingly.

My latest focus: baby shoes. From this pattern. Oh, Internet, how I love your free sewing ideas.

Here's the first pair I tried, for our Nugget. The trial run. I made them to go with a shirt I made for her... but since the shirt displays the first initial of her first name, I'll refrain from posting it here.

1107_1256

And, once I realized I could successfully construct baby shoes, I tried making some for friends, as a gift. I sent them along with a sushi-roll changing pad to match, for a certain baby boy named Drew.

1026_1267

Since I haven't actually tried them out before on a real, live, child, I cannot speak to their durability, fit, or any other practical piece of this equation. I'm just hoping for the best. Hopefully baby Drew likes them okay.

1026_1266

After sending those off, I figured that Nugget needed another pair. I love the orange and yellow, but let's face it, her wardrobe tends to include quite a few pinks. So of course she needs another pair to match. Right? Because nothing says "practical" like shoes for a child that can't walk, even if they do match the rest of her wardrobe.

1107_1251-1

For this pair I thought it'd be fun to try out some applique. It turned out to be a fun addition to the project. However, as I turned to Josh to show off my latest completed shoe yesterday over football, he asked me, "Now how many shoes have you made today?"

"Um, just the one."
"Wow, those take a long time."
"Yes, yes they do."

1107_1249-1


But really, I don't mind.

Thursday, October 21, 2010

Sewing.

I've really been enjoying sewing lately. These days it's a great way to kill time before lovingly prepare for our baby's arrival. I have also discovered that the Internet provides a wealth of easy ideas, patterns and tutorials. Go figure!

Not surprisingly, I really love making baby stuff. Cute little items for Nugget? Absolutely. But I also truly enjoy making simple things friends, too. A couple of years ago I started making burp cloths. Very fun. Since then I've enjoyed finding cute flannel and experimenting with the designs - it's more interesting that way.

Frayed edges = fun.


I've also started experimenting with applique onesies. Like this one. I actually made a little set of these - one for our baby and two for the LeCompte boys. I'm hoping we get a chance to line all three babies up together wearing these.


And it's fun to use scraps from burp cloths and other larger projects and turn them into a coordinated little set.


Last night I tried something new. My parents got me this great messenger bag for my birthday (I'm TOTALLY a sucker for messenger bags, btw) and thought it might work well for a diaper bag down the line. I agree! We have a more traditional diaper bag too, but it'd be nice to go out with the baby at times and just look like I have a large purse. Right?


Yes, those are my snowflake pajama pants you see there. And no, this picture wasn't taken first thing in the morning. PJ pants are simply more comfortable than my maternity pants these days.

Anywho, I saw this Sushi-roll changing pad tutorial online last week, and was immediately interested. And thought it might be fun to make a changing pad that coordinated with my new messenger bag. I mean, before I can start making these as gifts I need to try one out on my own family, right?

So I bought some material (on sale at Jo-Ann's), batting, and elastic.

p align="center">


I was hoping for some decorative/colorful elastic, but alas Jo-Ann's only had white and black. Oh well.

I cut out the "pattern" (a 18x22 inch rectangle of two coordinating materials + batting) and ironed it.


And then, following the very easy instructions, and watching old 30 Rock episodes at the same time, I sewed it together in no time. I love projects that take an hour or less... and those that are super duper easy... and those where I really like the result.


To store in your diaper bag/purse, just fold in half and roll.


A perfect match? No. But they jive.


Next I'd like to try...

-Headbands

-This bib

-These shoes

-These letters

-Pretty much all of this stuff

I've got my work cut out for me. Who knows how much I'll continue to do one Nugget arrives, but for now I'm having a lot of fun. Anyone have any favorite crafty websites to share? Any fun projects I should try and tackle? I need then to be easy. Leave some suggestions for me!